23 October 2006
A413 trans rebuild part 2 - beginning of main driveline disassembly
Sunday night I started disassembling the transmission in preparation for the overhaul. I already have the parts kit including all of the seals, as well as a heavy-duty replacement reverse-band strut and a complete set of replacement clutches and steels. I spent $86 on that stuff, tax included at a local transmission supply house; the ATSG manual cost me $12 on Ebay. The little reverse band strut cost $9 by itself; a fairly expensive little chunk of steel.
The ATSG manual is a big help; I also am indebted to Paul E. Smith, who has posted some rebuild information here, it isn't quite enough to go on by itself, but it does add some photos that the ATSG book doesn't have.
My goal here is to document this in pictures as much as I can...mostly so I can figure out how it all goes back together later! I also hope that maybe some of this stuff will be helpful to somebody else like me who's doing their first trans rebuild. So on to the pictures....
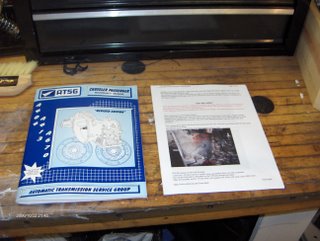 Ya gotta have good reference material before taking something like this on. Pictured on the left is the $12 ATSG service manual for the A413 series. It's pretty much a copy of the factory shop manual, but it also has updated information that your particular model year's shop manual won't have -- improved replacement parts and such. It's a worthwhile investment, even if you have the FSM. On the right is a print-out of the web page mentioned above.
 My little contribution to do-it-yourself home automatic transmission repair: notice the trans is sitting on top of one of those cheap oil drip pans you can get for under $10 at most any parts store. It's like a giant cookie sheet, and the raised lip around the edge will contain a LOT of liquid. It's impossible to completely drain the trans while it's on the car, so you need to be prepared to manage the mess ahead of time. Note the empty milk jug with the turkey baster sticking out of it -- I suctioned up the fluid from the pan and squirted it into the jug. I value my life highly, so I got my own turkey baster instead of using one from the kitchen. Finally, you'll see the roll of shop towels -- this is what has been recommended to me in using to clean the internal parts, as they're lint-free and disposable. Available at Autozone for $2 a roll.
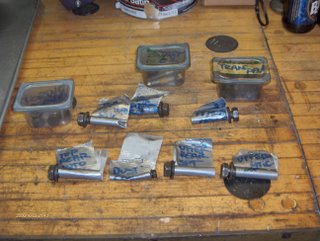 Organization: I know a few people who could take something as complicated as a transmission apart, throw all the pieces into a box, and then have no trouble figuring out where everything goes afterward. I am not that smart, and although I'm just as tempted as the next guy to take shortcuts, I figured out awhile back that such shortcuts usually end up taking me four times as long in the final consideration. So I label stuff, and try to keep my work area as neat as possible. I put each wrench back as soon as I'm done using it. I know, I know. I'm anal.
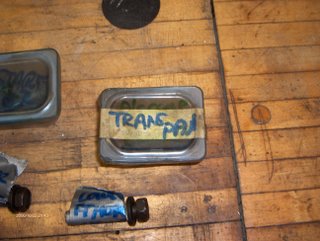 These little containers are great for this kind of work. They started marketing baby fruit in them shortly after Joshua was born, and fortunately I hung onto a bunch of them. I used the same ones back when I tore the Intrepid's engine apart, and they're reusable over and over again. I'm not saying you should just go up to any woman with a baby and ask her if she has any of these...but you know, sometimes the oddest things have been known to work!
 Pulling the front pump. I struggled with this for 45 minutes, even after reading that it should just pop right out, more or less, by using a couple of long bolts threaded into the bolt holes that secure the pump to the transmission body. Well, the ATSG manual isn't a lot of help on this -- they suggest you "attach slide hammers" -- and the other guy's website does mention that there are two threaded bolt holes in the pump, but I guess I'm dense or something. It turns out that two, and only two, of the pump bolt holes have threads that are in the pump body! All the bolt holes have threads, of course, but all except for two have them behind the pump body in the transmission case itself. I couldn't break that thing loose to save my life....duh! Now I'll be chasing the threads in the trans case a 'lil bit to undo some minor damage.
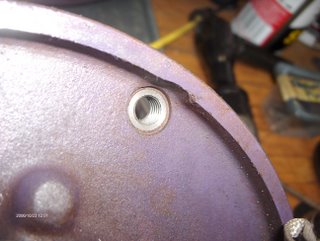 Here's a close shot of one of the front pump bolt holes that is threaded. You'll notice that only two of them are like this. A 3/8ths dia. bolt screws right in. Get one that's at least 6" long, and you can just pry the pump out of the case with a hammer like the other web site suggests. It really does come out easily when you're doing it right.
 Another image of the front pump -- this time out of the transmission -- with the bolt I used to extract it.
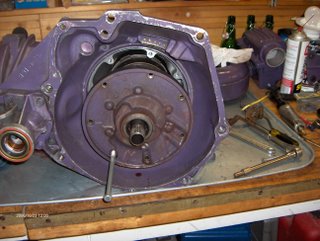
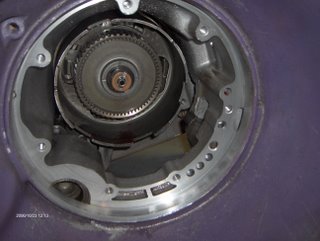
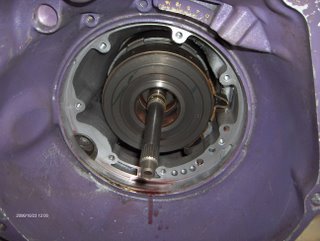 This is what lurks inside of the transmission behind the front pump -- the front (reverse) clutch assembly. You can't see it, but I've got the band adjustment cranked down as tight as it will go to keep everything together while I pulled the cover off, just as the ATSG book recommends.
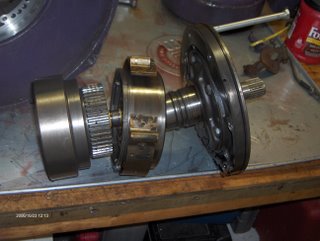 Here's a shot of the front pump, the front clutch assembly, the main shaft, and the rear clutch drum all lined up roughly the same way they are found inside the transmission.
 This is a pair of detail shots of the front clutch drum assembly, again, remember I'm trying to document how things go together for myself.
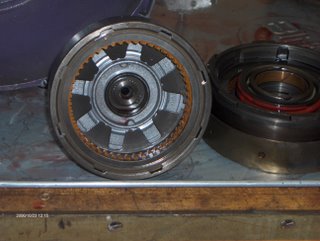
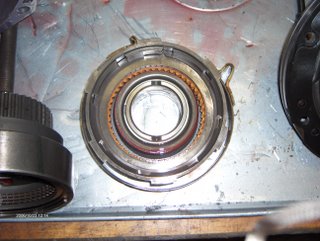
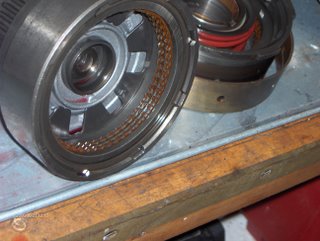 This is a pair of detail shots of the rear clutch drum assembly. Hopefully I'm catching everything in the pictures I might need when I go to reassemble.
 I've been told that you have to have stuff immaculately clean in order for a trans overhaul to be a success instead of a time bomb. So I went nuts cleaning the RTV residue off of the trans pan, first using a razorblade scraper, and then finishing up with some coarse steel wool along with a little Gumout as a solvent. I noticed that although the steel wool does a good job of cleaning things up, it also leaves little fine bits of wire all over the place, which I played hell cleaning up. Damn, that pan is shiny, though.
 Finally, here's a picture of where I'll pick up next time -- this is a shot into the case of the transmission showing the #3 thrust washer. That comes out next.
¶ Monday, October 23, 2006
Finally, here's a picture of where I'll pick up next time -- this is a shot into the case of the transmission showing the #3 thrust washer. That comes out next.
¶ Monday, October 23, 2006 

The ATSG manual is a big help; I also am indebted to Paul E. Smith, who has posted some rebuild information here, it isn't quite enough to go on by itself, but it does add some photos that the ATSG book doesn't have.
My goal here is to document this in pictures as much as I can...mostly so I can figure out how it all goes back together later! I also hope that maybe some of this stuff will be helpful to somebody else like me who's doing their first trans rebuild. So on to the pictures....

 My little contribution to do-it-yourself home automatic transmission repair: notice the trans is sitting on top of one of those cheap oil drip pans you can get for under $10 at most any parts store. It's like a giant cookie sheet, and the raised lip around the edge will contain a LOT of liquid. It's impossible to completely drain the trans while it's on the car, so you need to be prepared to manage the mess ahead of time. Note the empty milk jug with the turkey baster sticking out of it -- I suctioned up the fluid from the pan and squirted it into the jug. I value my life highly, so I got my own turkey baster instead of using one from the kitchen. Finally, you'll see the roll of shop towels -- this is what has been recommended to me in using to clean the internal parts, as they're lint-free and disposable. Available at Autozone for $2 a roll.
 Organization: I know a few people who could take something as complicated as a transmission apart, throw all the pieces into a box, and then have no trouble figuring out where everything goes afterward. I am not that smart, and although I'm just as tempted as the next guy to take shortcuts, I figured out awhile back that such shortcuts usually end up taking me four times as long in the final consideration. So I label stuff, and try to keep my work area as neat as possible. I put each wrench back as soon as I'm done using it. I know, I know. I'm anal.
 These little containers are great for this kind of work. They started marketing baby fruit in them shortly after Joshua was born, and fortunately I hung onto a bunch of them. I used the same ones back when I tore the Intrepid's engine apart, and they're reusable over and over again. I'm not saying you should just go up to any woman with a baby and ask her if she has any of these...but you know, sometimes the oddest things have been known to work!
 Pulling the front pump. I struggled with this for 45 minutes, even after reading that it should just pop right out, more or less, by using a couple of long bolts threaded into the bolt holes that secure the pump to the transmission body. Well, the ATSG manual isn't a lot of help on this -- they suggest you "attach slide hammers" -- and the other guy's website does mention that there are two threaded bolt holes in the pump, but I guess I'm dense or something. It turns out that two, and only two, of the pump bolt holes have threads that are in the pump body! All the bolt holes have threads, of course, but all except for two have them behind the pump body in the transmission case itself. I couldn't break that thing loose to save my life....duh! Now I'll be chasing the threads in the trans case a 'lil bit to undo some minor damage.
 Here's a close shot of one of the front pump bolt holes that is threaded. You'll notice that only two of them are like this. A 3/8ths dia. bolt screws right in. Get one that's at least 6" long, and you can just pry the pump out of the case with a hammer like the other web site suggests. It really does come out easily when you're doing it right.
 Another image of the front pump -- this time out of the transmission -- with the bolt I used to extract it.
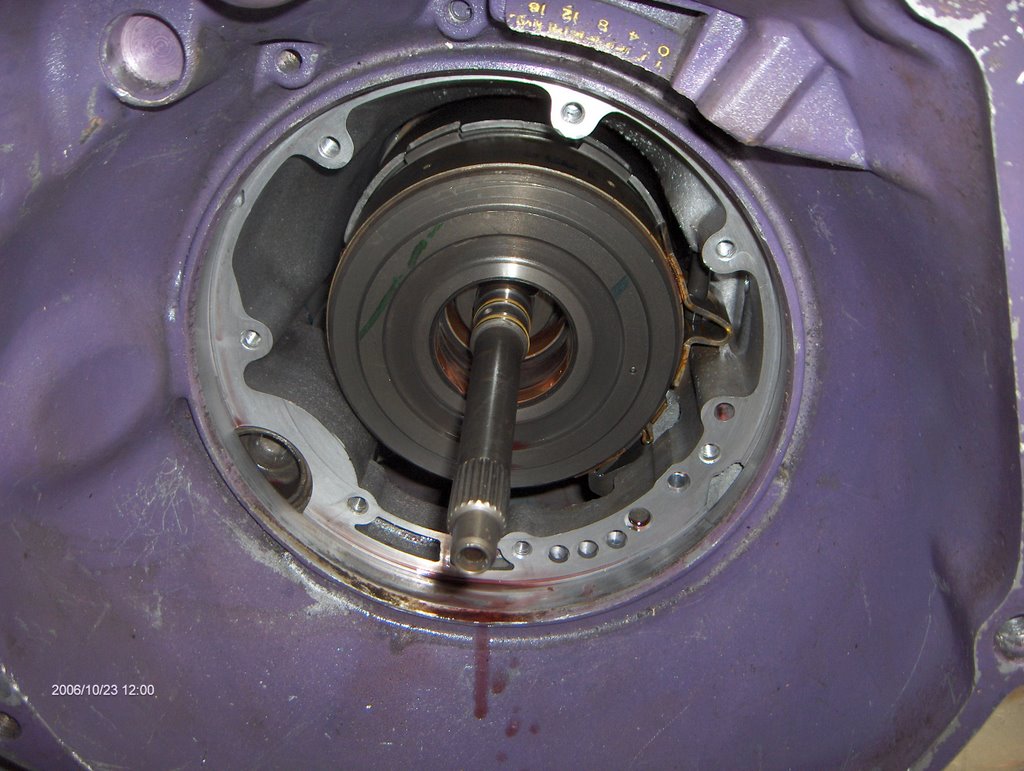 This is what lurks inside of the transmission behind the front pump -- the front (reverse) clutch assembly. You can't see it, but I've got the band adjustment cranked down as tight as it will go to keep everything together while I pulled the cover off, just as the ATSG book recommends.
 Here's a shot of the front pump, the front clutch assembly, the main shaft, and the rear clutch drum all lined up roughly the same way they are found inside the transmission.
 This is a pair of detail shots of the front clutch drum assembly, again, remember I'm trying to document how things go together for myself.
 This is a pair of detail shots of the rear clutch drum assembly. Hopefully I'm catching everything in the pictures I might need when I go to reassemble.
 Finally, here's a picture of where I'll pick up next time -- this is a shot into the case of the transmission showing the #3 thrust washer. That comes out next.
¶ Monday, October 23, 2006
Finally, here's a picture of where I'll pick up next time -- this is a shot into the case of the transmission showing the #3 thrust washer. That comes out next.
¶ Monday, October 23, 2006 