25 October 2006
A413 trans rebuild part 3 - more main driveline disassembly and some broken stuff
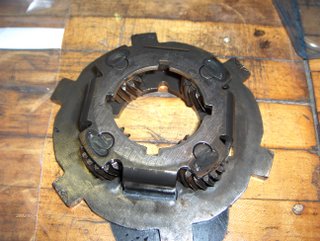
Last night's adventure into Home Transmission Repair(TM) brought us to a crossroads of sorts: do we replace the low overrun clutch cam or not?
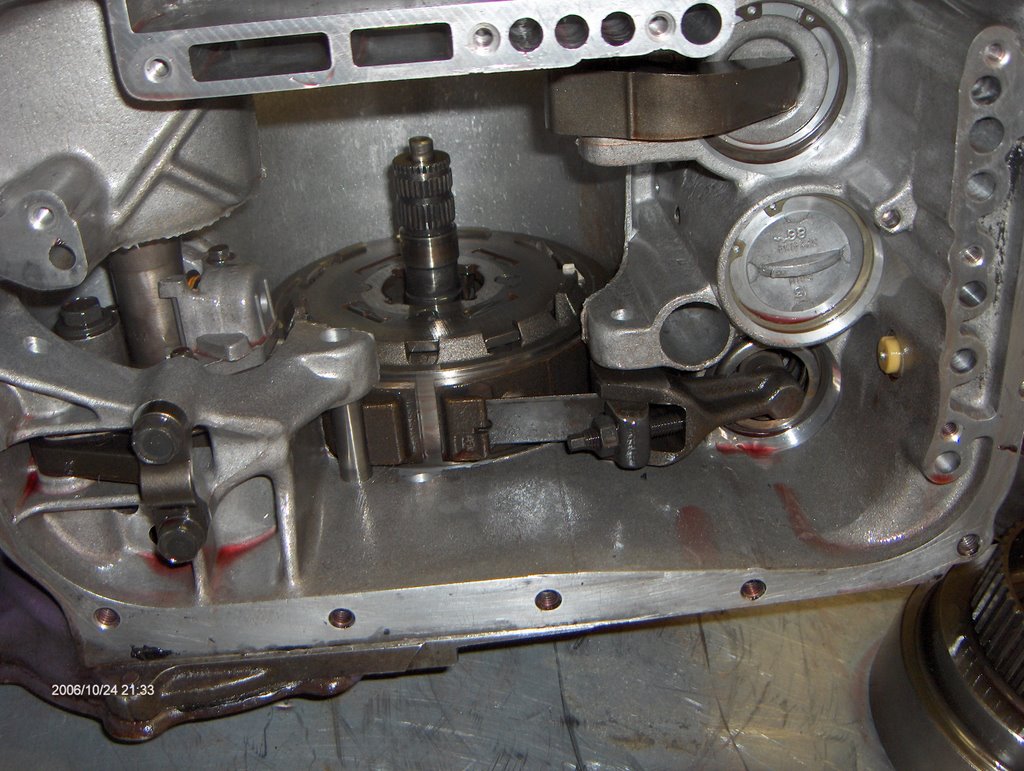
Perhaps a picture will help:
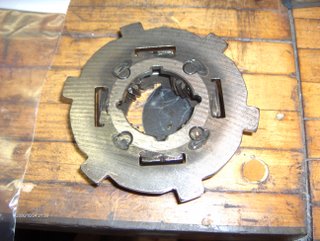
 If you click on the photo to zoom in, you'll see where in the places where the rollers and springs go, there are grooves worn into the machined surface. I don't think I'd be able to accurately measure the depth of the grooves given the micrometer I have, but they're definitely deep enough to catch a fingernail on.
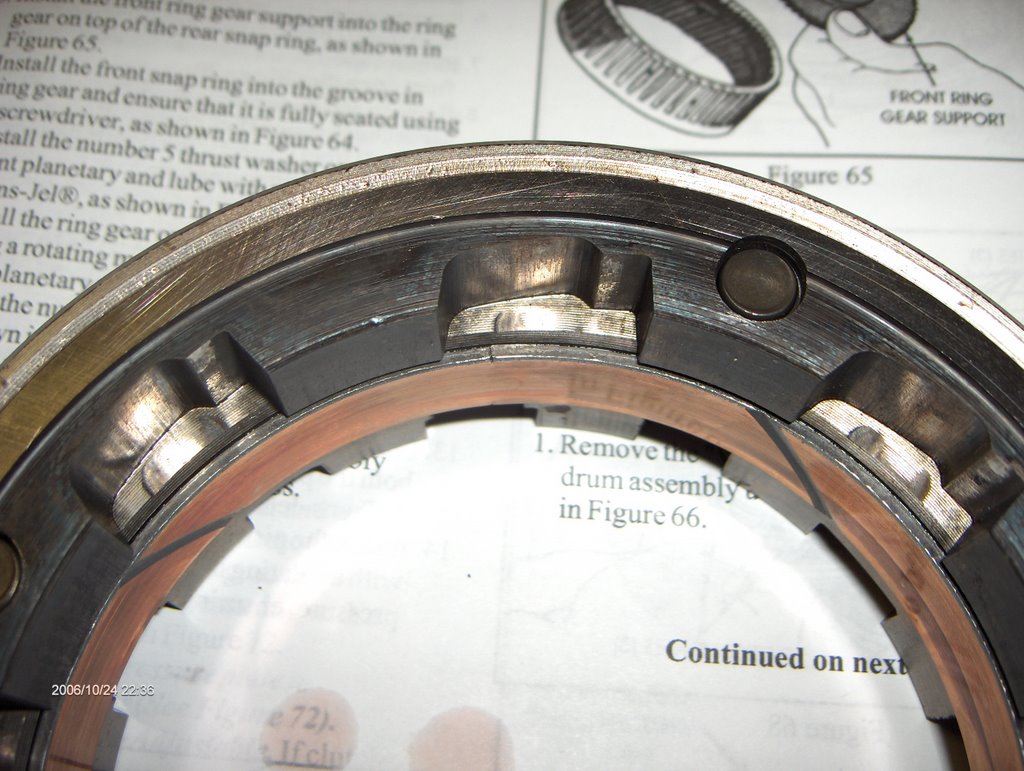
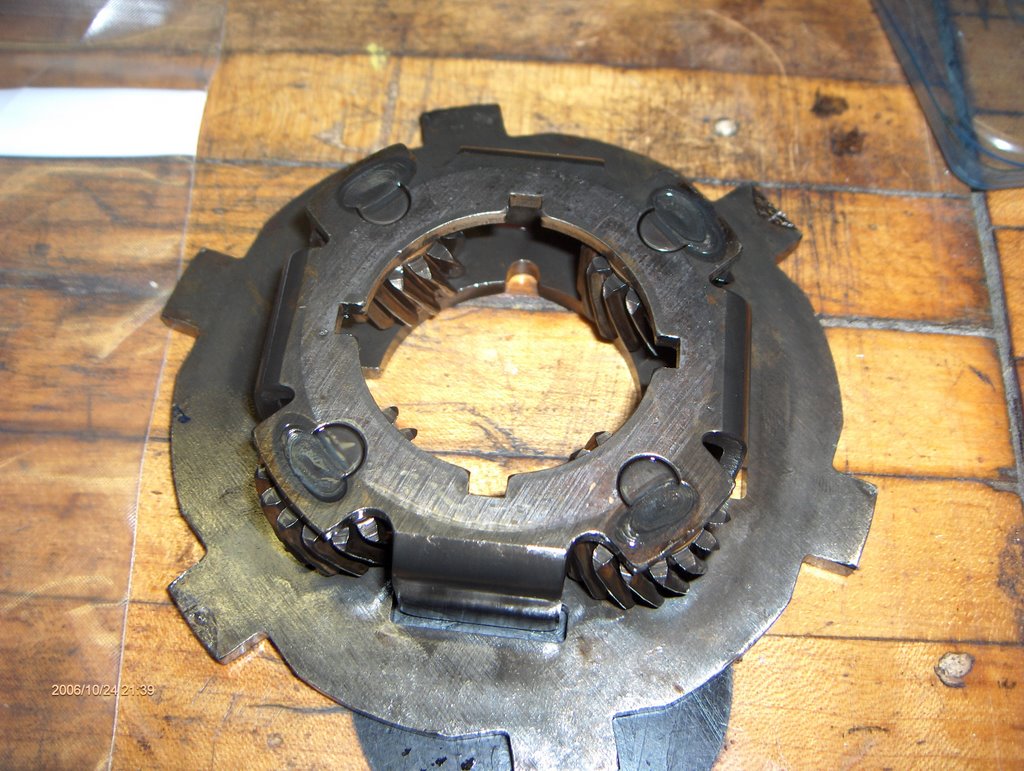
 In this shot, we're looking at the low overrun clutch cam from the opposite direction. Notice the slight discoloration in the brass-colored material in the band in the center. If this discoloration was the only wear I saw, I wouldn't condemn the part.
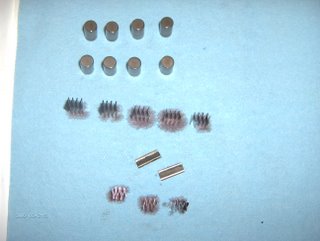 This is the collection of rollers and springs I got out of this thing. There are supposed to be 8 rollers and 8 springs. I found all of the rollers, but I didn't find a complete set of springs. With the way this assembly came apart, there's a remote chance that some of the springs ended up in the differential section of the trans; I haven't gotten there yet. But notice the broken springs I did find....I find it difficult to believe that these just broke as I was taking things apart -- it's possible, I guess -- but I rather doubt it. So I'm thinking that the wear pattern on the overrun clutch plus the broken spring pieces = time for a new low overrun clutch cam.
I've talked on the phone with my friendly local transmission parts supply house, and there's a guy there with an experienced eye who will take a look for me and tell me if it needs to be swapped.
(Update: I took the part down to the shop and let the guy take a look. I also talked to another supply house about what I was looking at. Both said that 'nobody ever replaces those' -- they just put new springs and rollers in and run 'em. This might be a testament to the poor quality of local rebuilders, or it just might be a fact of life that this isn't something that gets replaced unless it's utterly destroyed, in which case the rest of the trans is beyond repair. The bottom line is that the part is only available used anyway, and the overrunning clutch did not appear to be the source of my tranny's problems, and somebody who looks at this stuff every day said it looked okay to him. Much as I want perfection, I guess I'm going to have to settle for less.)
I'm definitely going to replace the rollers and springs, of course. They're pretty cheap, fortunately -- $6 for the complete set.
****
And now for my front planetary disassembly:
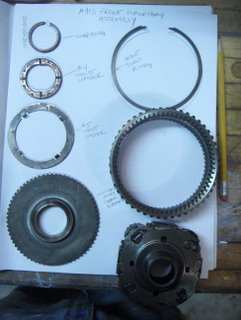 As you might be able to tell, I'm working overtime in the documentation department, laying out which part is which. After I cleaned these parts I laid them out on the sheet of paper, traced them, and then labeled the tracings. I know I'm getting the parts clean -- the sheet of paper serves as a white glove test and there's nary a mark of dirt or oil on it. After I cleaned up the parts from this assembly, I bagged them in a gallon-sized zip lock bag, with the sheet of paper folded up inside for future reference. Overkill? Maybe for experienced trans techs. As for me, it's serving to help me remember the names of the parts, what they go with, etc.
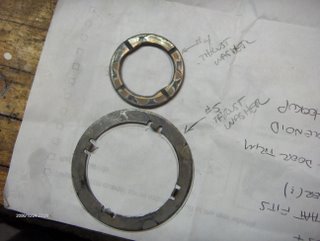
You'll see that there are signs of wear in this closeup on the #4 and #5 thrust washers. It's similar to the wear I've found on almost all of the metal thrust washers, indicating a well-worn transmission in general. The "flat" thrust washers -- not sure what material they're made of, but it appears to be some type of fiber -- all seem to be in good shape with no visible indication of wear. In my inexperience, I would have thought that thrust washers would be part of the "master" rebuild kit I purchased, but it turns out that they're not. Hopefully I can get a kit that replaces all of the thrust washers, or at least the metal ones.
****
 Oriented the way it rides in the transmission
 On one side from underneath
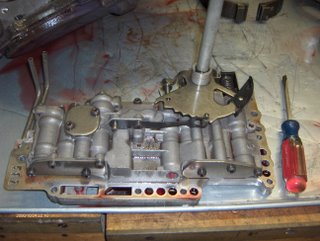
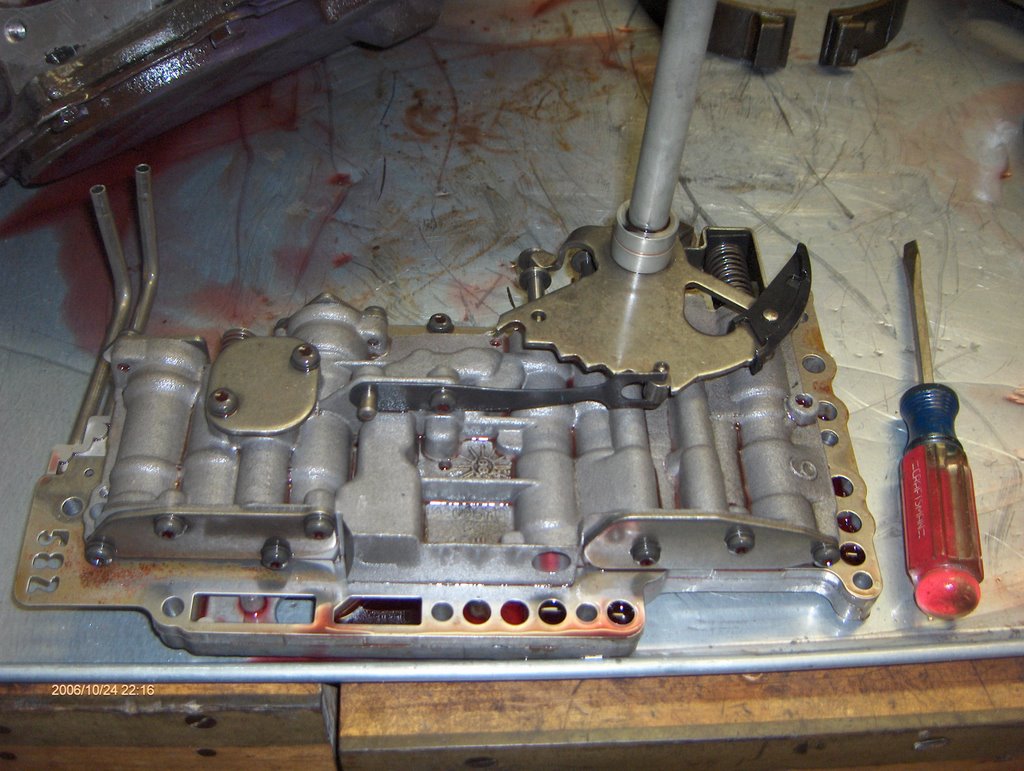
Just for reference's sake, here are a couple of shots of the valve body. Note that this thing has been drained and disassembled for three or four days at this point and it's still full of fluid. Ever wonder why it's so hard to drain the transmission completely? This is why!
****
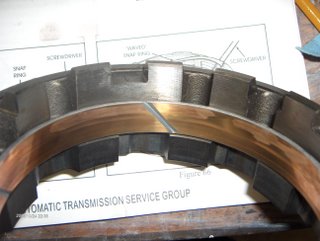
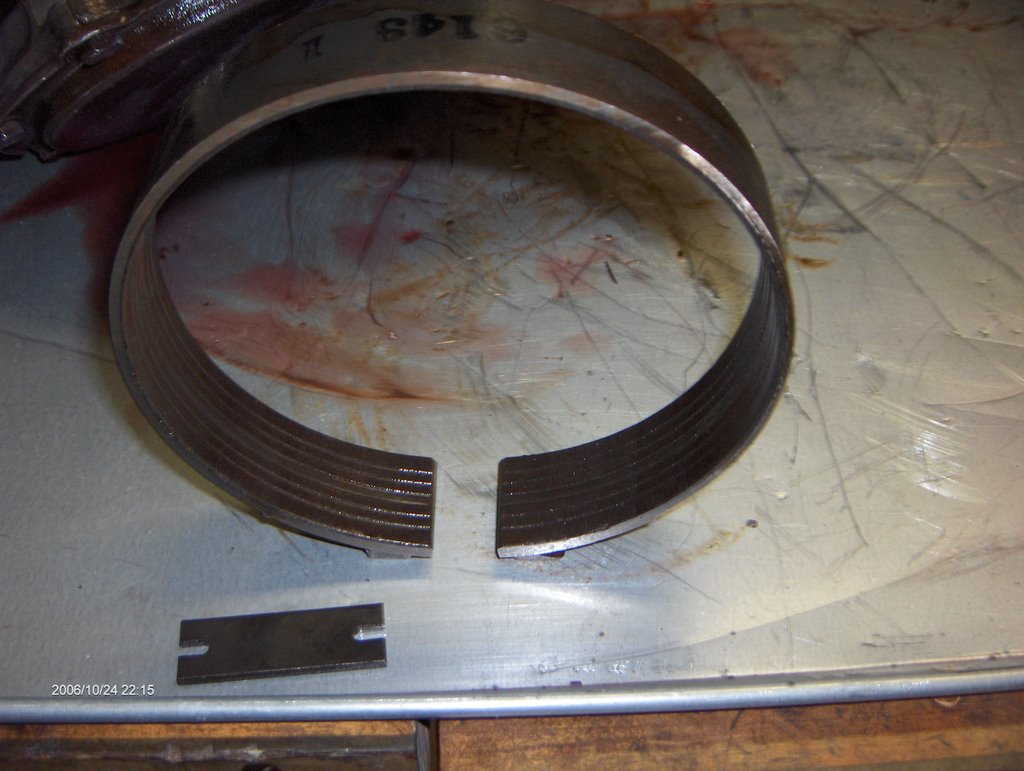
 This is the low/reverse band and strut. The band doesn't have any obvious signs of wear on it; I've already got the heavy-duty Sonnax-brand strut replacement ready to go when I reassemble.
****
Rear planetary carrier assembly:
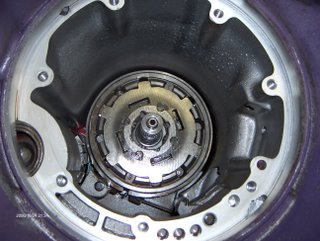 Still in trans.
 Flipped over for inspection
 Facing down as it does in the shot taken inside the transmission
...and front and back views. I don't see any signs of wear; I'm just going to clean it up and reuse it as-is. It's tack-welded together, so there's no easy disassembly/planetary gear replacement in the picture anyway. I don't see any broken or cracked gear teeth (I've looked them over as carefully as I can) and nothing seems excessively sloppy. (Trans parts guy: "no gear whine? You're cool with what you have.")
****
Here's a few pics of the rear drum.
 Still in the trans as viewed through the drain pan opening
 Facing upward as it does when removed through bellhousing
 Face down showing sun gear
****
Thrust washers? Yep, I've got 'em....
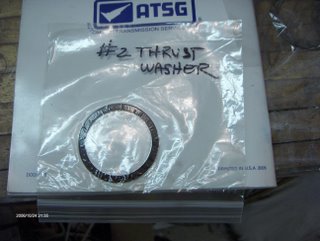
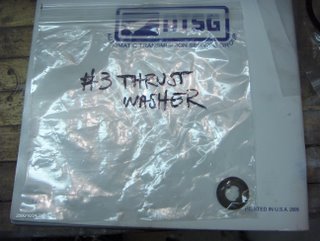

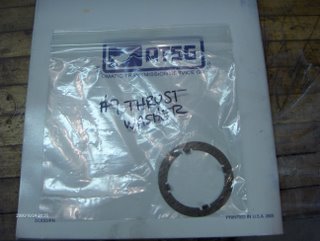
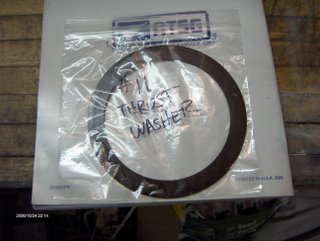
I was considering just replacing the metal ones that have obvious signs of wear on them. Again, as I discussed this on the phone and in person with the trans parts guy, the condition of these does not necessarily indicate replacement is necessary. Regardless, I wanted to replace at least the metal ones....
...but they didn't have one of the washers individually without breaking into a set. They were absolutely willing to do that, but I took this as a sign and bought the whole set. For $17, it's hard to go too far wrong.
***
General notes:
I'm taking the MML's advice and bagging components both before and after I clean them.
 Front planetary carrier assembly before cleanup
 Forward clutch and band awaiting cleanup.


Perhaps a picture will help:
 If you click on the photo to zoom in, you'll see where in the places where the rollers and springs go, there are grooves worn into the machined surface. I don't think I'd be able to accurately measure the depth of the grooves given the micrometer I have, but they're definitely deep enough to catch a fingernail on.
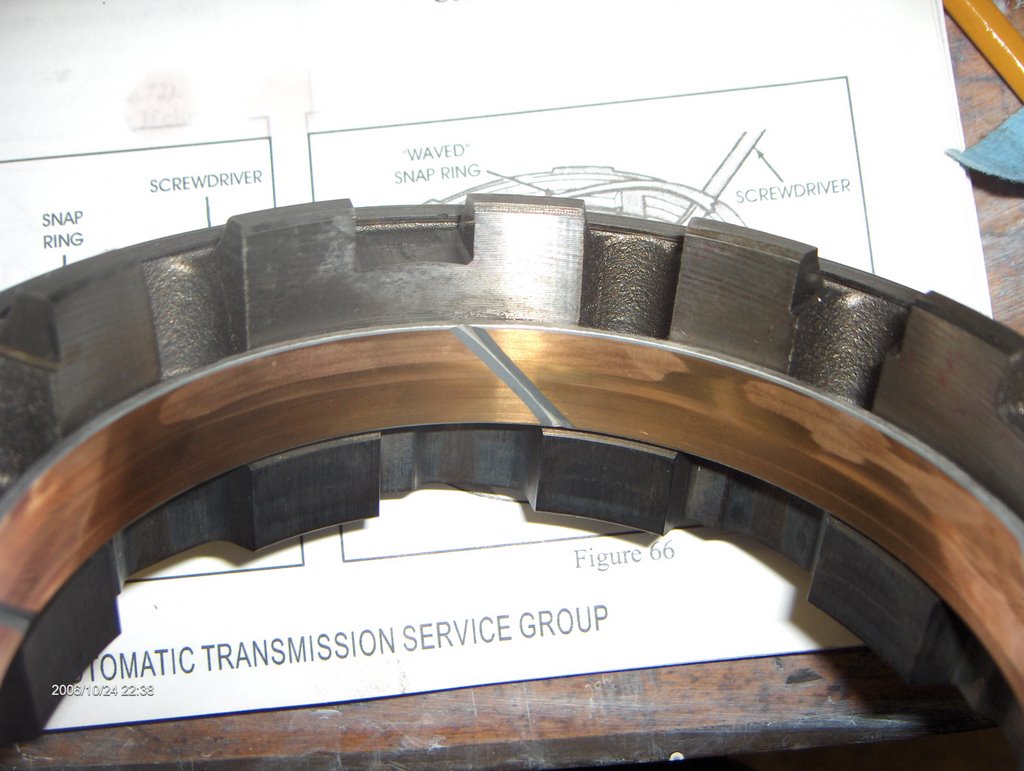 In this shot, we're looking at the low overrun clutch cam from the opposite direction. Notice the slight discoloration in the brass-colored material in the band in the center. If this discoloration was the only wear I saw, I wouldn't condemn the part.
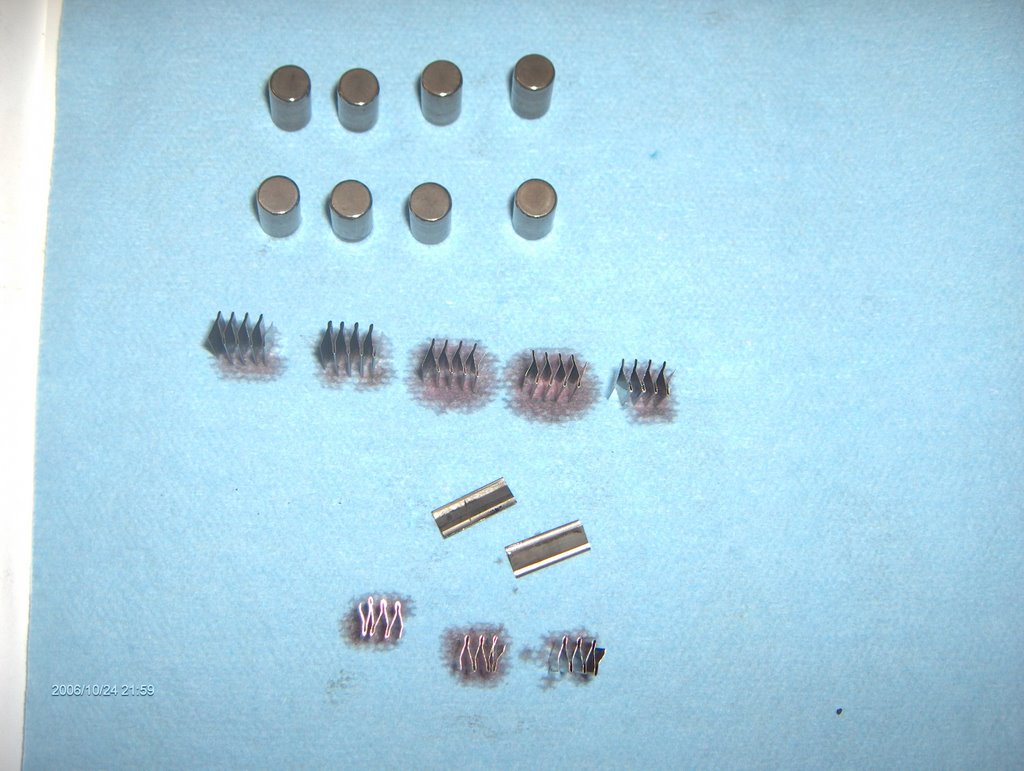 This is the collection of rollers and springs I got out of this thing. There are supposed to be 8 rollers and 8 springs. I found all of the rollers, but I didn't find a complete set of springs. With the way this assembly came apart, there's a remote chance that some of the springs ended up in the differential section of the trans; I haven't gotten there yet. But notice the broken springs I did find....I find it difficult to believe that these just broke as I was taking things apart -- it's possible, I guess -- but I rather doubt it. So I'm thinking that the wear pattern on the overrun clutch plus the broken spring pieces = time for a new low overrun clutch cam.
I've talked on the phone with my friendly local transmission parts supply house, and there's a guy there with an experienced eye who will take a look for me and tell me if it needs to be swapped.
(Update: I took the part down to the shop and let the guy take a look. I also talked to another supply house about what I was looking at. Both said that 'nobody ever replaces those' -- they just put new springs and rollers in and run 'em. This might be a testament to the poor quality of local rebuilders, or it just might be a fact of life that this isn't something that gets replaced unless it's utterly destroyed, in which case the rest of the trans is beyond repair. The bottom line is that the part is only available used anyway, and the overrunning clutch did not appear to be the source of my tranny's problems, and somebody who looks at this stuff every day said it looked okay to him. Much as I want perfection, I guess I'm going to have to settle for less.)
I'm definitely going to replace the rollers and springs, of course. They're pretty cheap, fortunately -- $6 for the complete set.
****
And now for my front planetary disassembly:
 As you might be able to tell, I'm working overtime in the documentation department, laying out which part is which. After I cleaned these parts I laid them out on the sheet of paper, traced them, and then labeled the tracings. I know I'm getting the parts clean -- the sheet of paper serves as a white glove test and there's nary a mark of dirt or oil on it. After I cleaned up the parts from this assembly, I bagged them in a gallon-sized zip lock bag, with the sheet of paper folded up inside for future reference. Overkill? Maybe for experienced trans techs. As for me, it's serving to help me remember the names of the parts, what they go with, etc.
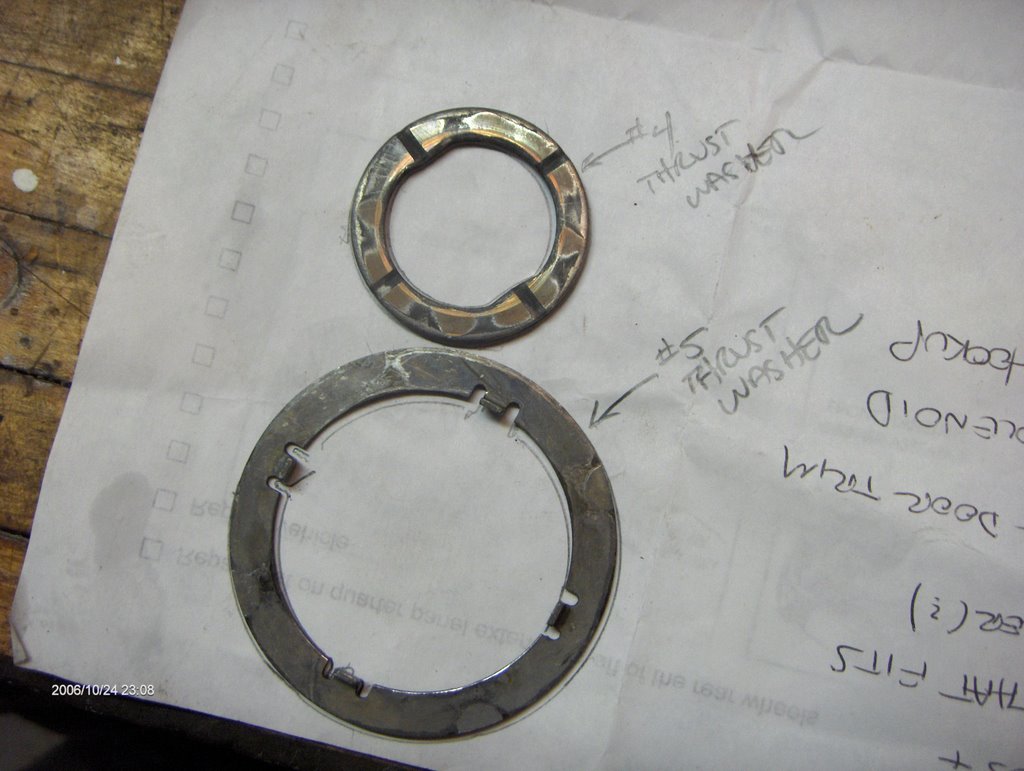
You'll see that there are signs of wear in this closeup on the #4 and #5 thrust washers. It's similar to the wear I've found on almost all of the metal thrust washers, indicating a well-worn transmission in general. The "flat" thrust washers -- not sure what material they're made of, but it appears to be some type of fiber -- all seem to be in good shape with no visible indication of wear. In my inexperience, I would have thought that thrust washers would be part of the "master" rebuild kit I purchased, but it turns out that they're not. Hopefully I can get a kit that replaces all of the thrust washers, or at least the metal ones.
****
 Oriented the way it rides in the transmission
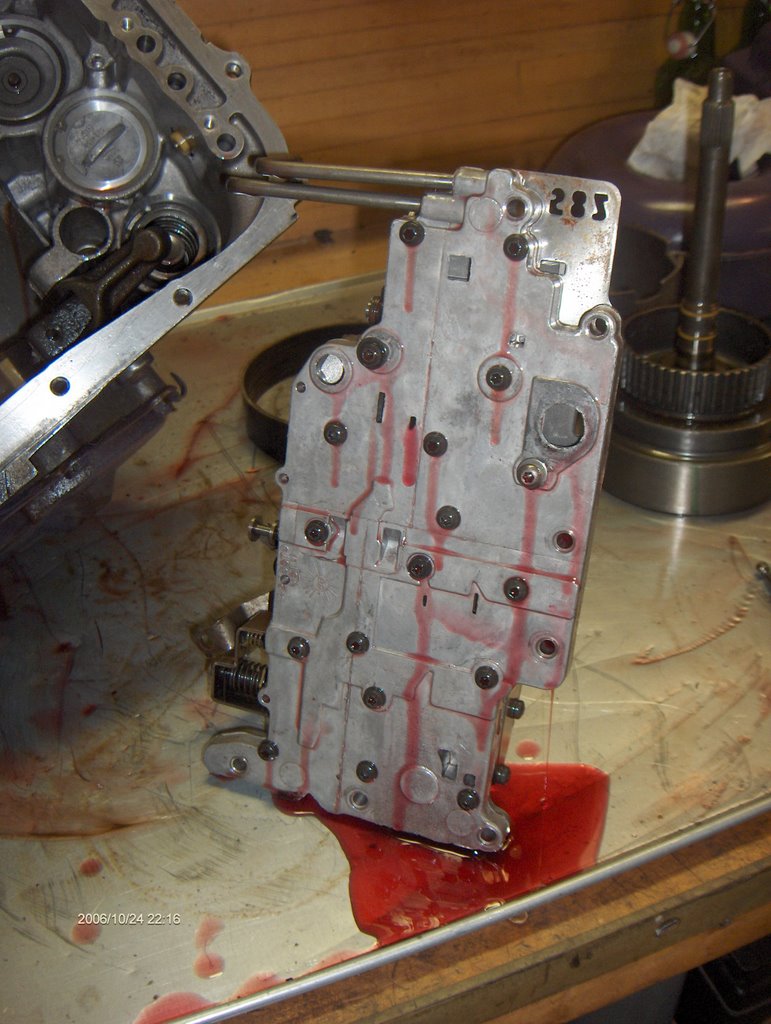 On one side from underneath
****
 This is the low/reverse band and strut. The band doesn't have any obvious signs of wear on it; I've already got the heavy-duty Sonnax-brand strut replacement ready to go when I reassemble.
****
Rear planetary carrier assembly:
 Flipped over for inspection
 Facing down as it does in the shot taken inside the transmission
****
Here's a few pics of the rear drum.
 Still in the trans as viewed through the drain pan opening
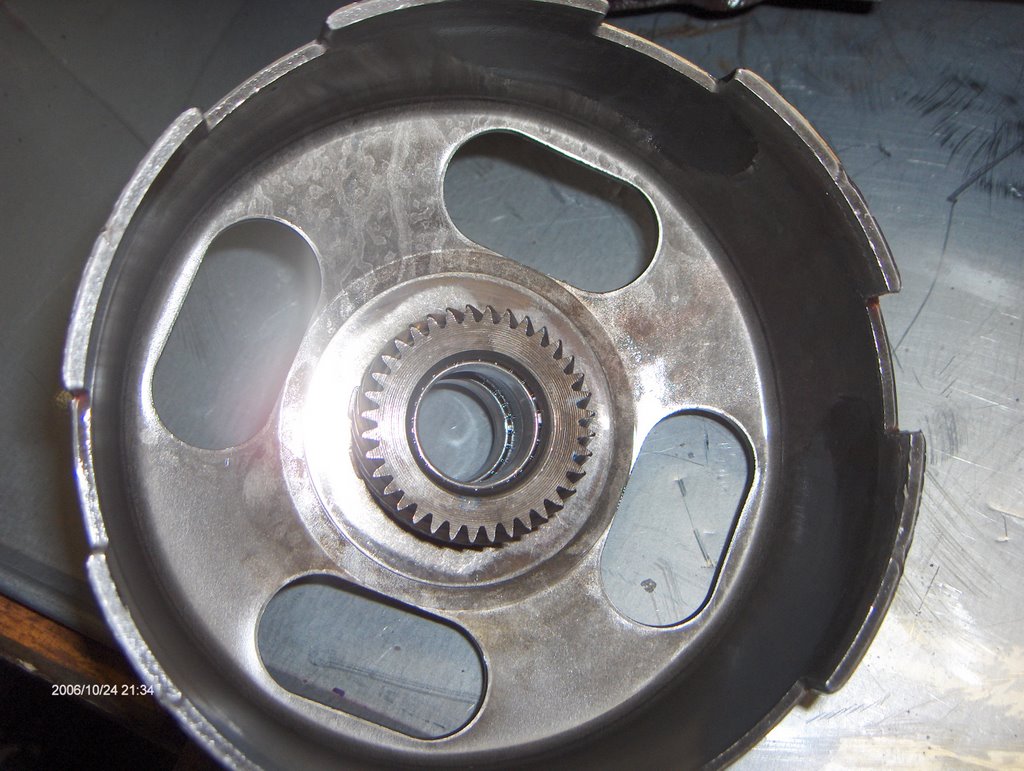 Facing upward as it does when removed through bellhousing
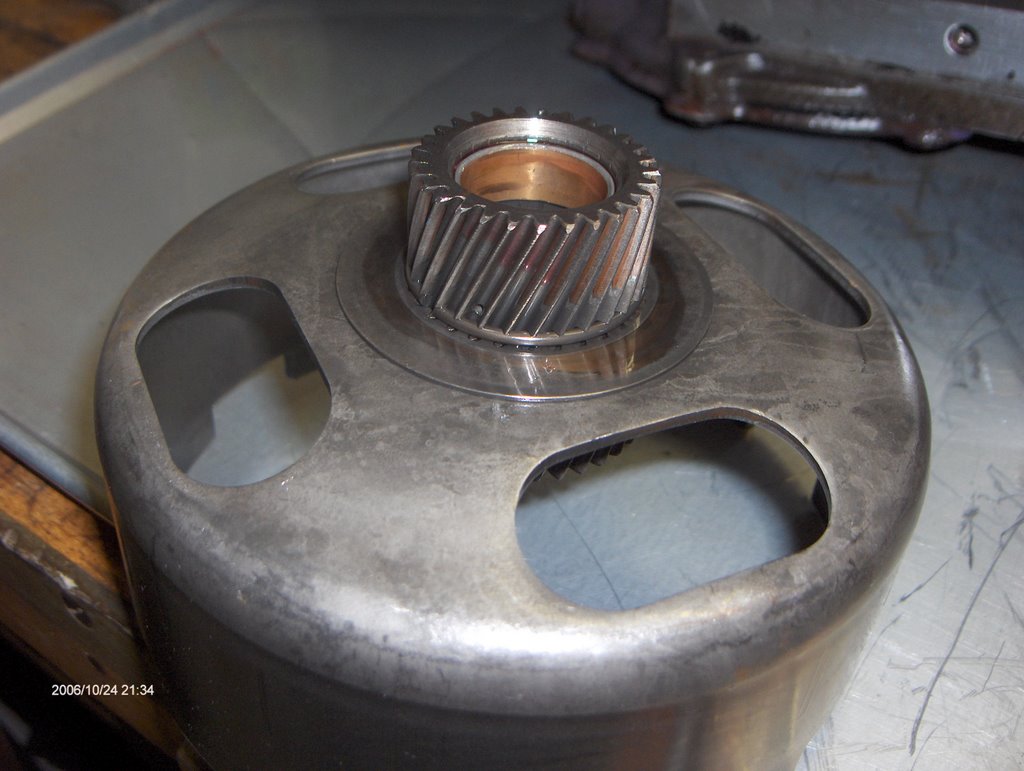 Face down showing sun gear
Thrust washers? Yep, I've got 'em....


I was considering just replacing the metal ones that have obvious signs of wear on them. Again, as I discussed this on the phone and in person with the trans parts guy, the condition of these does not necessarily indicate replacement is necessary. Regardless, I wanted to replace at least the metal ones....
...but they didn't have one of the washers individually without breaking into a set. They were absolutely willing to do that, but I took this as a sign and bought the whole set. For $17, it's hard to go too far wrong.
***
General notes:
I'm taking the MML's advice and bagging components both before and after I clean them.
 Front planetary carrier assembly before cleanup
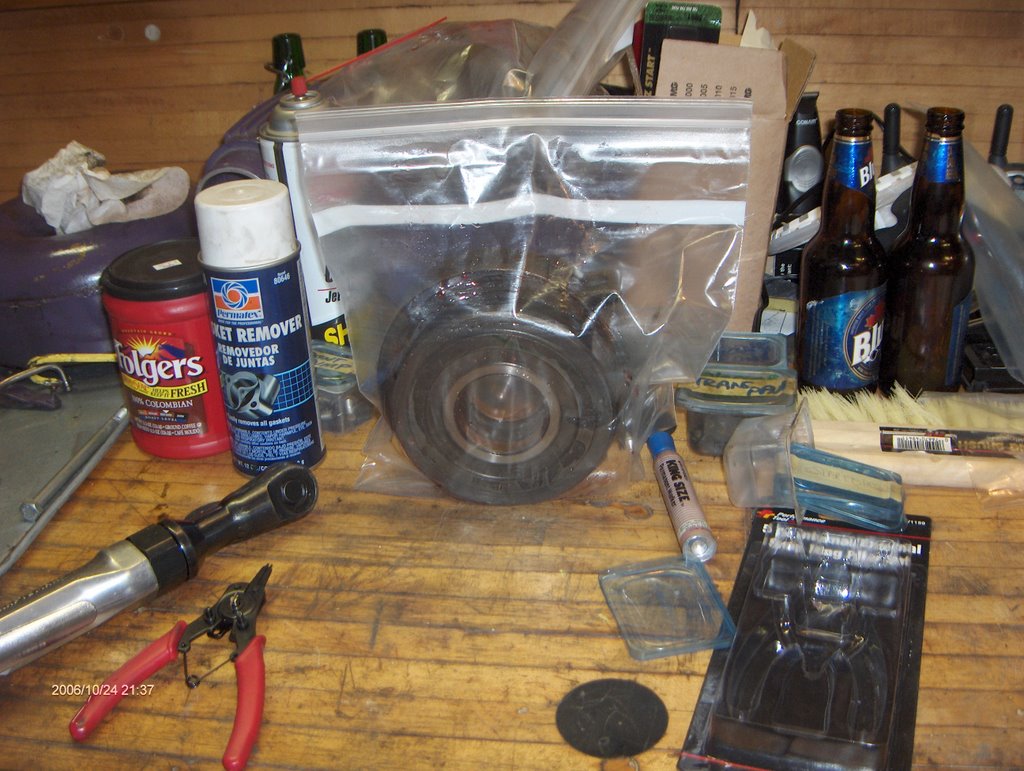 Forward clutch and band awaiting cleanup.
The idea is to keep things together, and also to keep cleaned components dust and lint-free. Use gallon-sized ziplock bags; all but the largest components will fit inside. I'm also using sandwich-sized bags for the thrust washers, and a Sharpie marker to label them. The Sharpie's ink doesn't just wipe off the plastic. Note the blue-labeled bottles of 'mechanic solvent' are used after the evening's transmission rebuilding session is over with...I've got a hard enough time keeping this stuff straight sober...
****
Next up is more cleanup of the assemblies shown so far. Once I've gotten that done, then it's on to the differential section of the trans. I bought the "bat wings" -- the differential pin retainer kit that Chrysler came up with to prevent the pin from walking out and destroying the transmission case. It may be a few days before I get working on this again...Halloween's coming, and the kids need a pumpkin!
¶ Wednesday, October 25, 2006 ****
Next up is more cleanup of the assemblies shown so far. Once I've gotten that done, then it's on to the differential section of the trans. I bought the "bat wings" -- the differential pin retainer kit that Chrysler came up with to prevent the pin from walking out and destroying the transmission case. It may be a few days before I get working on this again...Halloween's coming, and the kids need a pumpkin!
