Perhaps a picture will help:
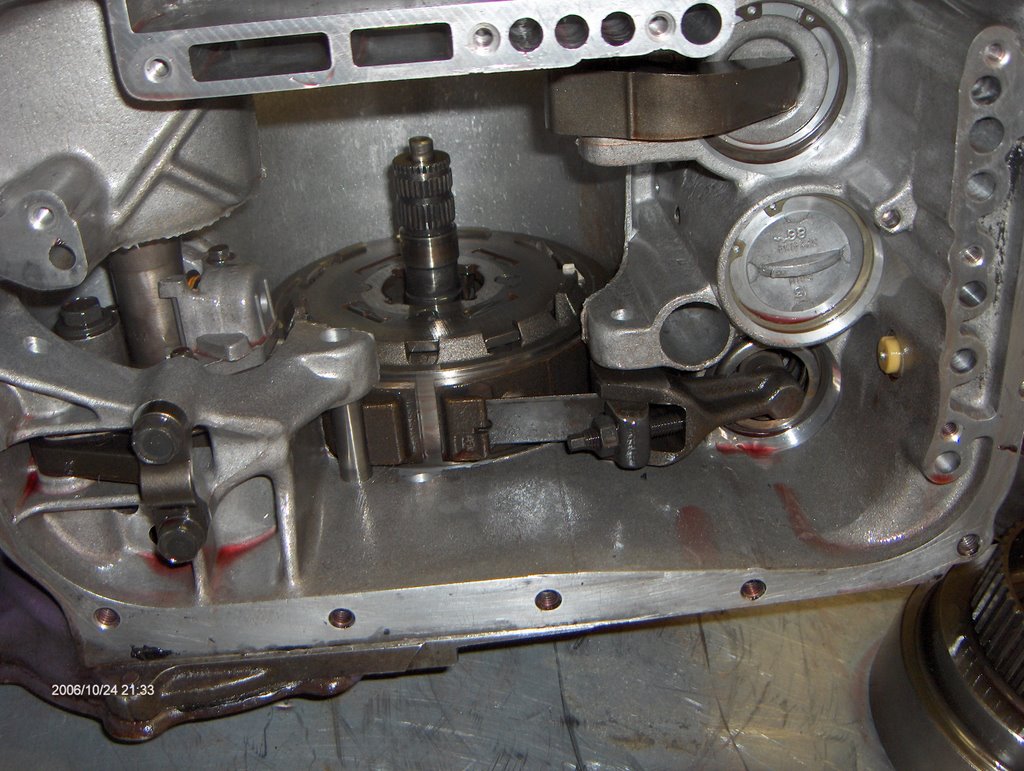
 If you click on the photo to zoom in, you'll see where in the places where the rollers and springs go, there are grooves worn into the machined surface. I don't think I'd be able to accurately measure the depth of the grooves given the micrometer I have, but they're definitely deep enough to catch a fingernail on.
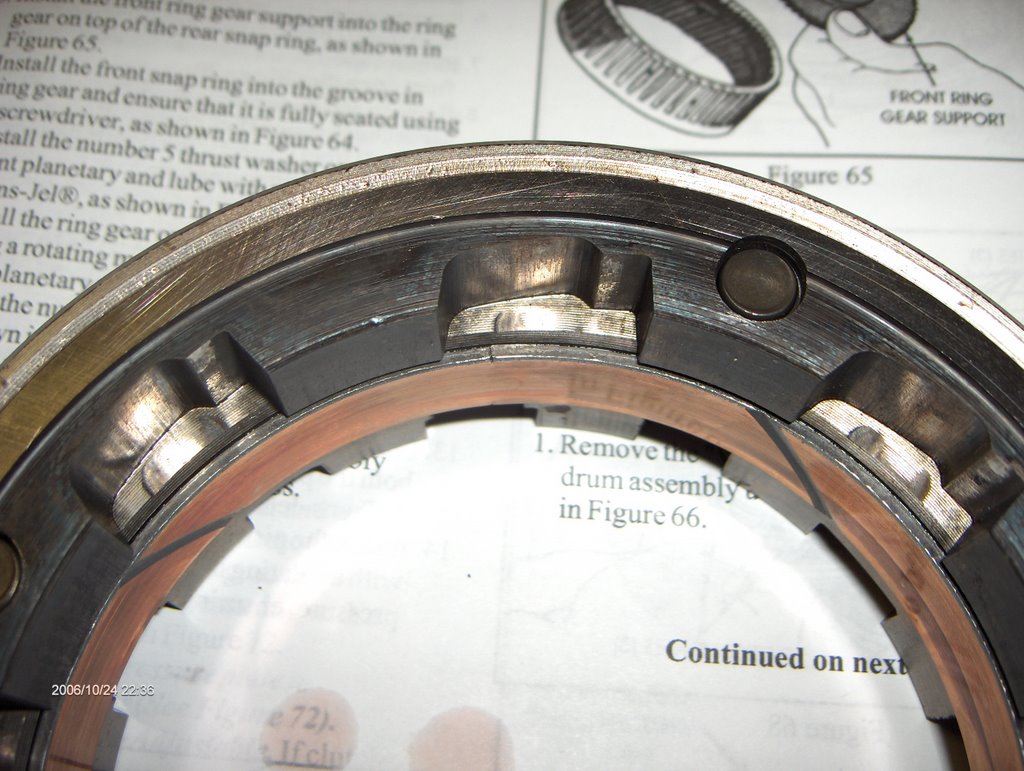
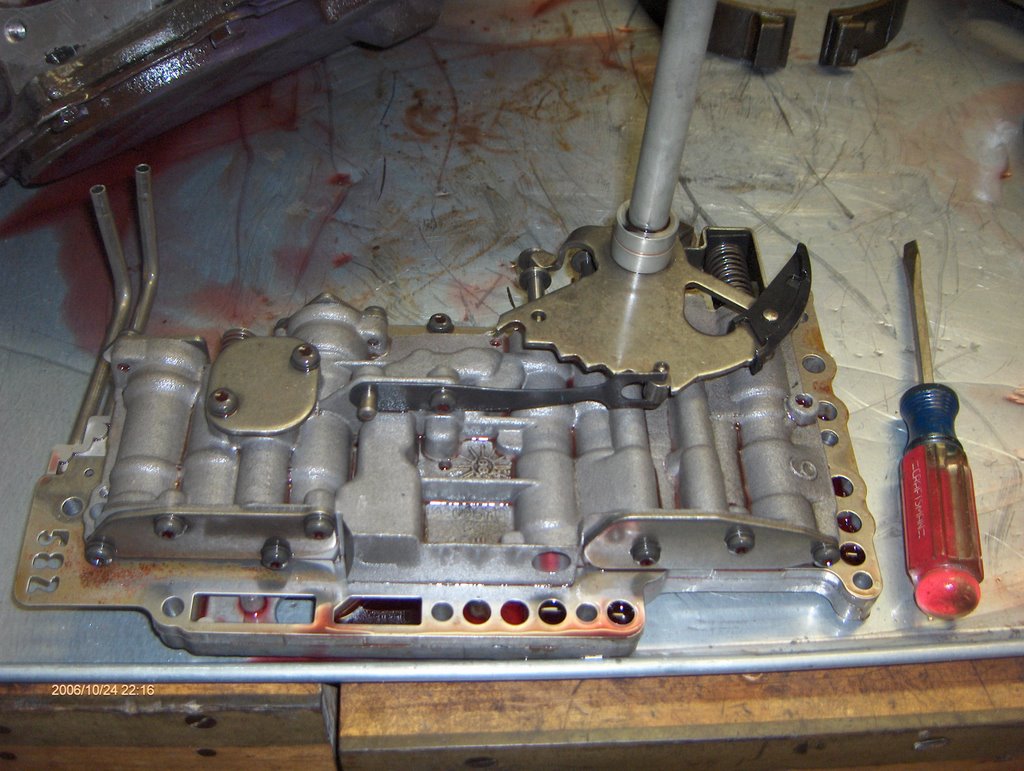
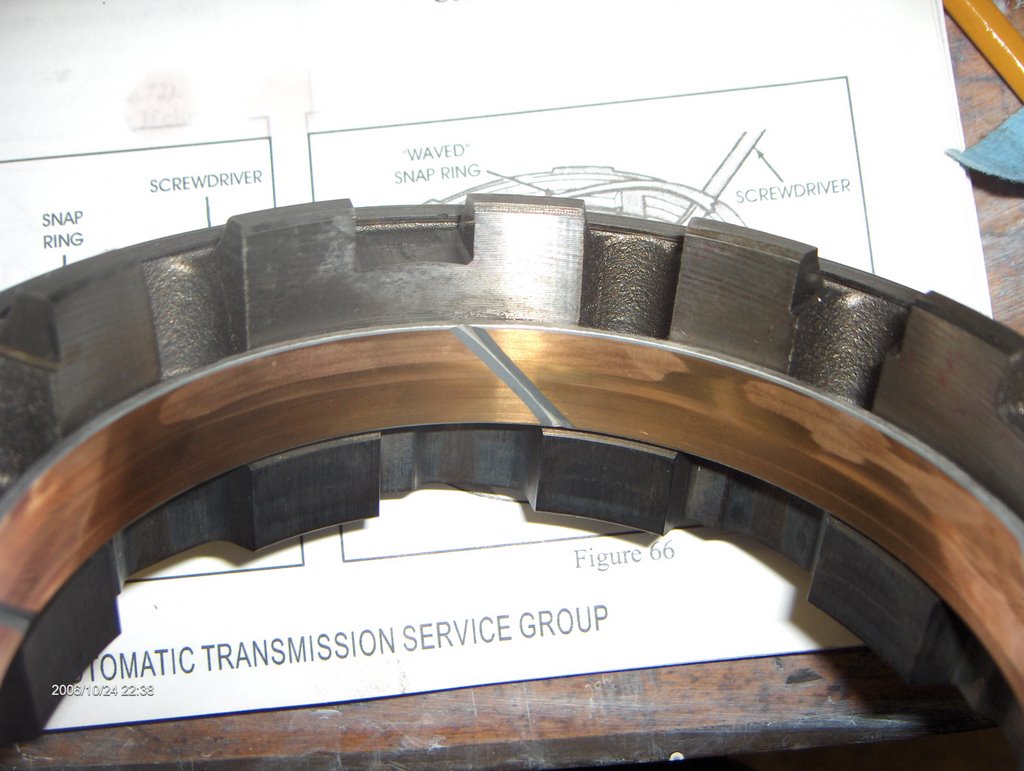 In this shot, we're looking at the low overrun clutch cam from the opposite direction. Notice the slight discoloration in the brass-colored material in the band in the center. If this discoloration was the only wear I saw, I wouldn't condemn the part.
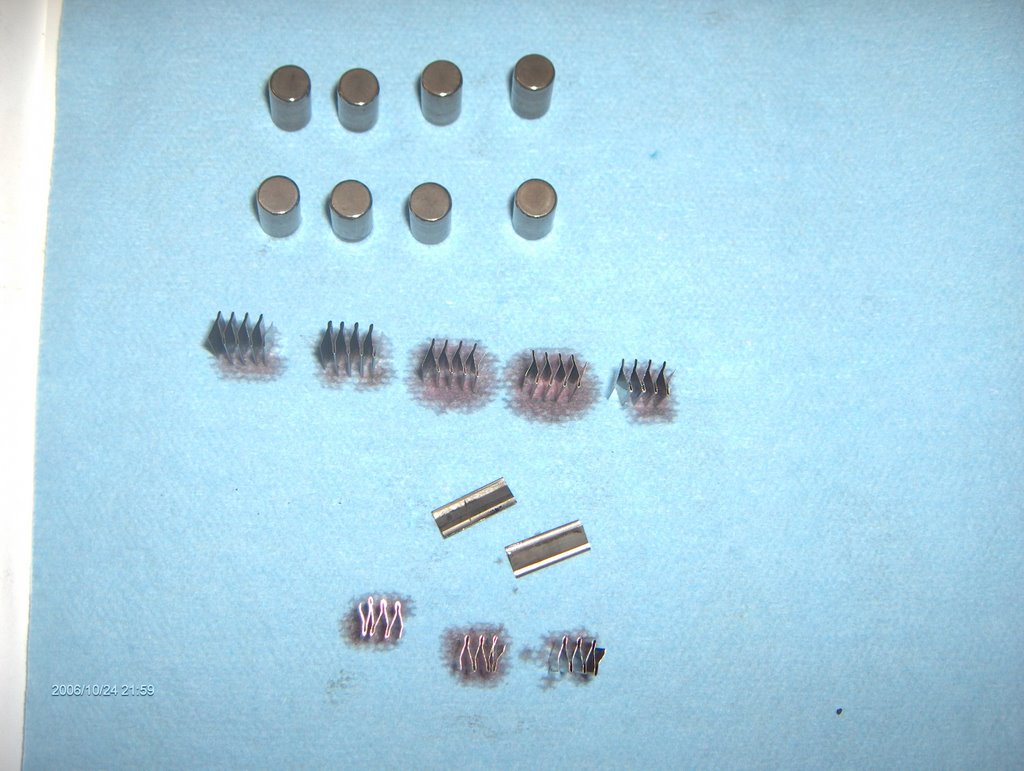 This is the collection of rollers and springs I got out of this thing. There are supposed to be 8 rollers and 8 springs. I found all of the rollers, but I didn't find a complete set of springs. With the way this assembly came apart, there's a remote chance that some of the springs ended up in the differential section of the trans; I haven't gotten there yet. But notice the broken springs I did find....I find it difficult to believe that these just broke as I was taking things apart -- it's possible, I guess -- but I rather doubt it. So I'm thinking that the wear pattern on the overrun clutch plus the broken spring pieces = time for a new low overrun clutch cam.
I've talked on the phone with my friendly local transmission parts supply house, and there's a guy there with an experienced eye who will take a look for me and tell me if it needs to be swapped.
(Update: I took the part down to the shop and let the guy take a look. I also talked to another supply house about what I was looking at. Both said that 'nobody ever replaces those' -- they just put new springs and rollers in and run 'em. This might be a testament to the poor quality of local rebuilders, or it just might be a fact of life that this isn't something that gets replaced unless it's utterly destroyed, in which case the rest of the trans is beyond repair. The bottom line is that the part is only available used anyway, and the overrunning clutch did not appear to be the source of my tranny's problems, and somebody who looks at this stuff every day said it looked okay to him. Much as I want perfection, I guess I'm going to have to settle for less.)
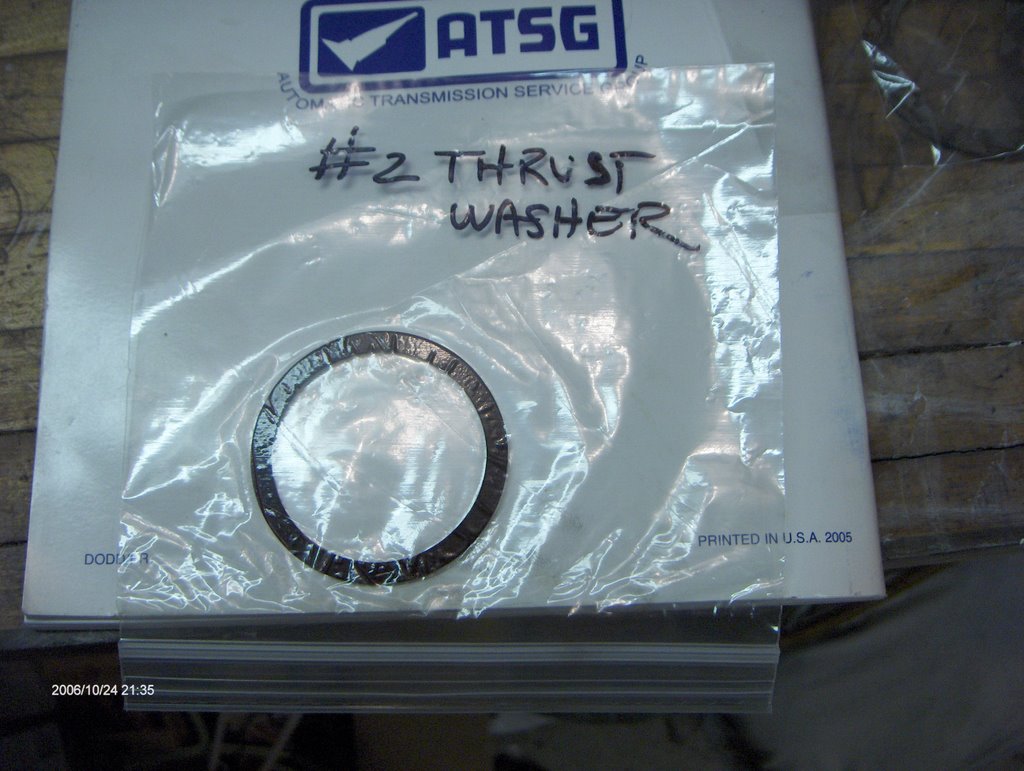
I'm definitely going to replace the rollers and springs, of course. They're pretty cheap, fortunately -- $6 for the complete set.
****
And now for my front planetary disassembly:
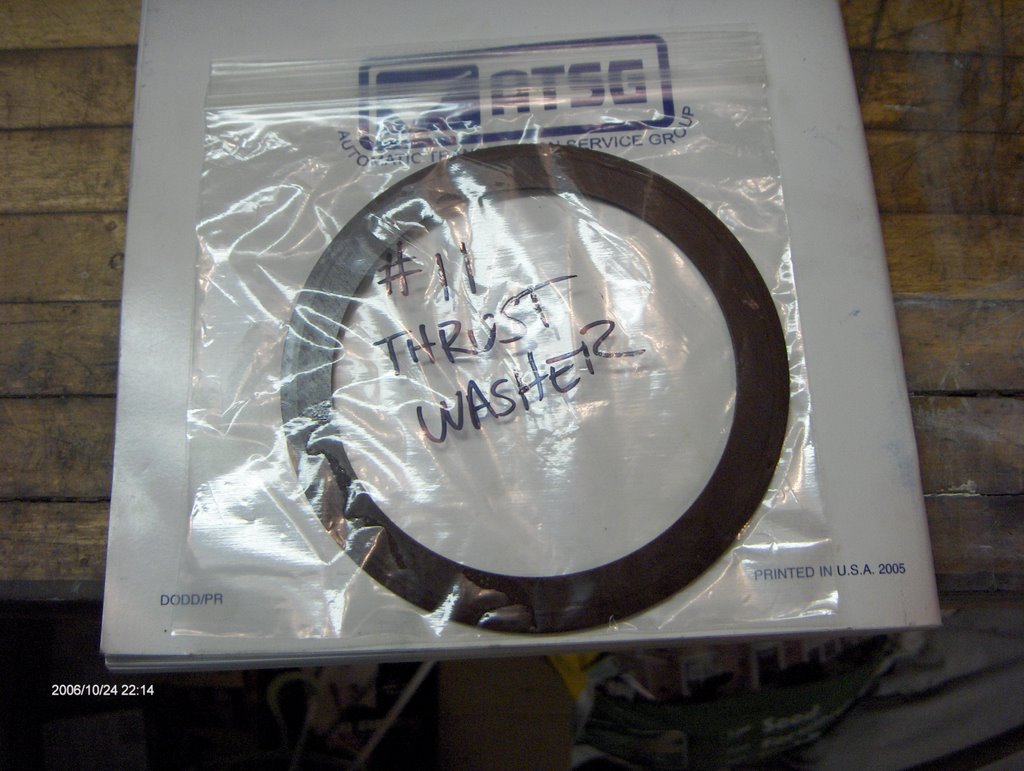
 As you might be able to tell, I'm working overtime in the documentation department, laying out which part is which. After I cleaned these parts I laid them out on the sheet of paper, traced them, and then labeled the tracings. I know I'm getting the parts clean -- the sheet of paper serves as a white glove test and there's nary a mark of dirt or oil on it. After I cleaned up the parts from this assembly, I bagged them in a gallon-sized zip lock bag, with the sheet of paper folded up inside for future reference. Overkill? Maybe for experienced trans techs. As for me, it's serving to help me remember the names of the parts, what they go with, etc.
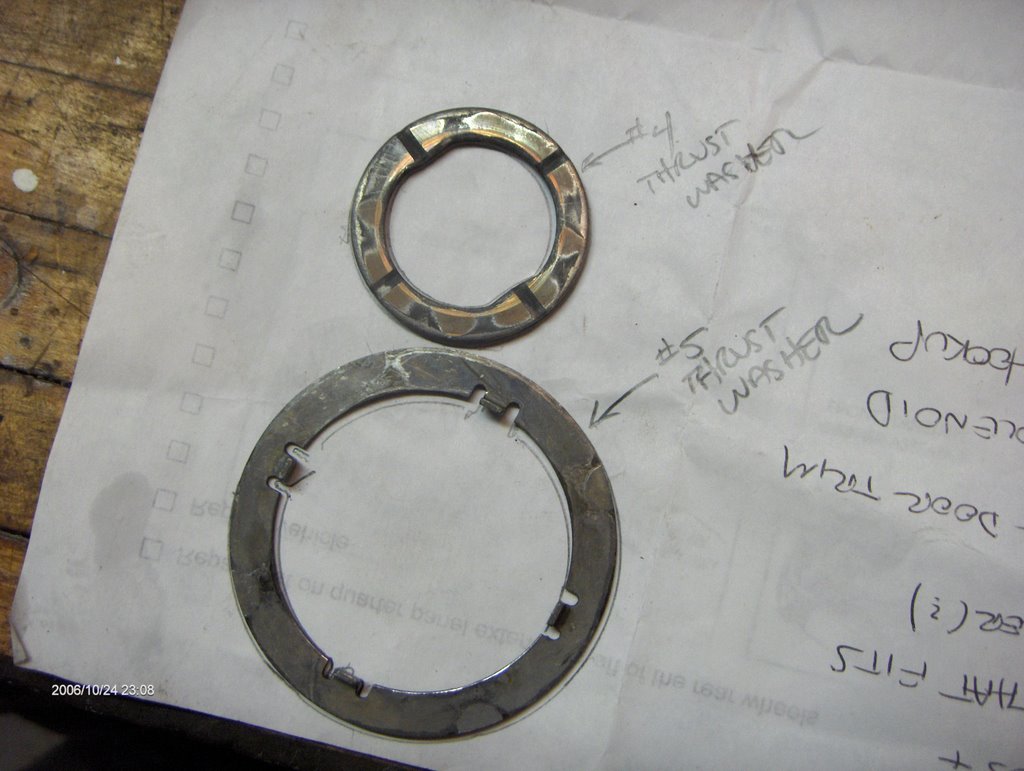
You'll see that there are signs of wear in this closeup on the #4 and #5 thrust washers. It's similar to the wear I've found on almost all of the metal thrust washers, indicating a well-worn transmission in general. The "flat" thrust washers -- not sure what material they're made of, but it appears to be some type of fiber -- all seem to be in good shape with no visible indication of wear. In my inexperience, I would have thought that thrust washers would be part of the "master" rebuild kit I purchased, but it turns out that they're not. Hopefully I can get a kit that replaces all of the thrust washers, or at least the metal ones.
****
 Oriented the way it rides in the transmission
 On one side from underneath
****
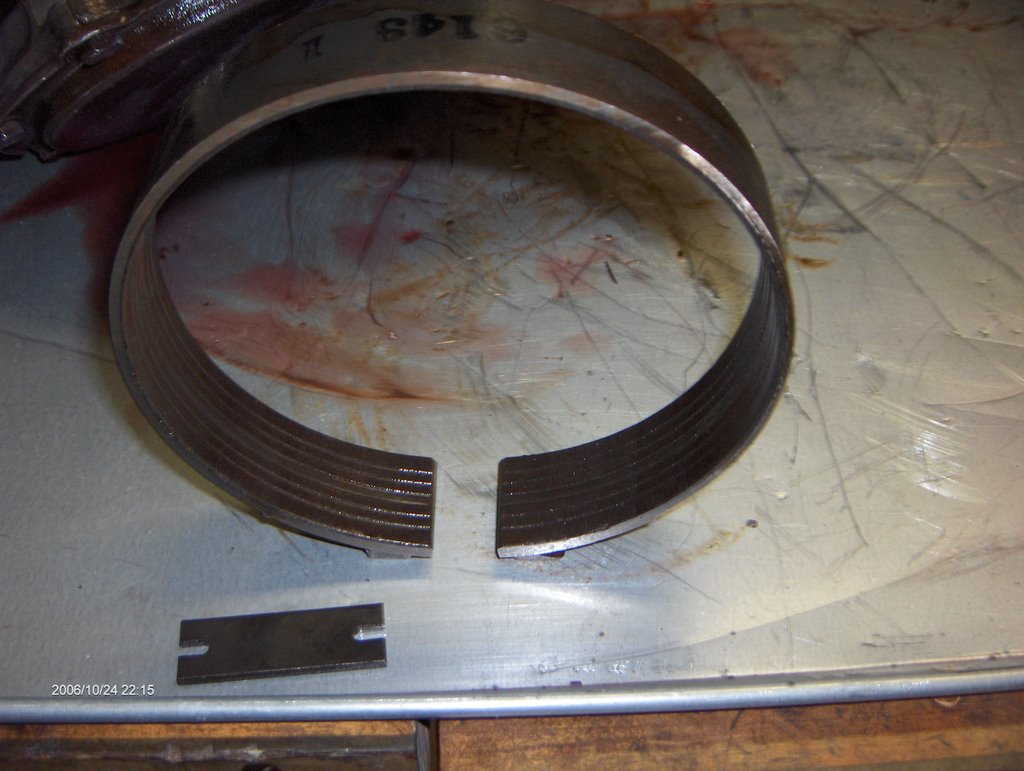 This is the low/reverse band and strut. The band doesn't have any obvious signs of wear on it; I've already got the heavy-duty Sonnax-brand strut replacement ready to go when I reassemble.
****
Rear planetary carrier assembly:
 Flipped over for inspection
 Facing down as it does in the shot taken inside the transmission
****
Here's a few pics of the rear drum.
 Still in the trans as viewed through the drain pan opening
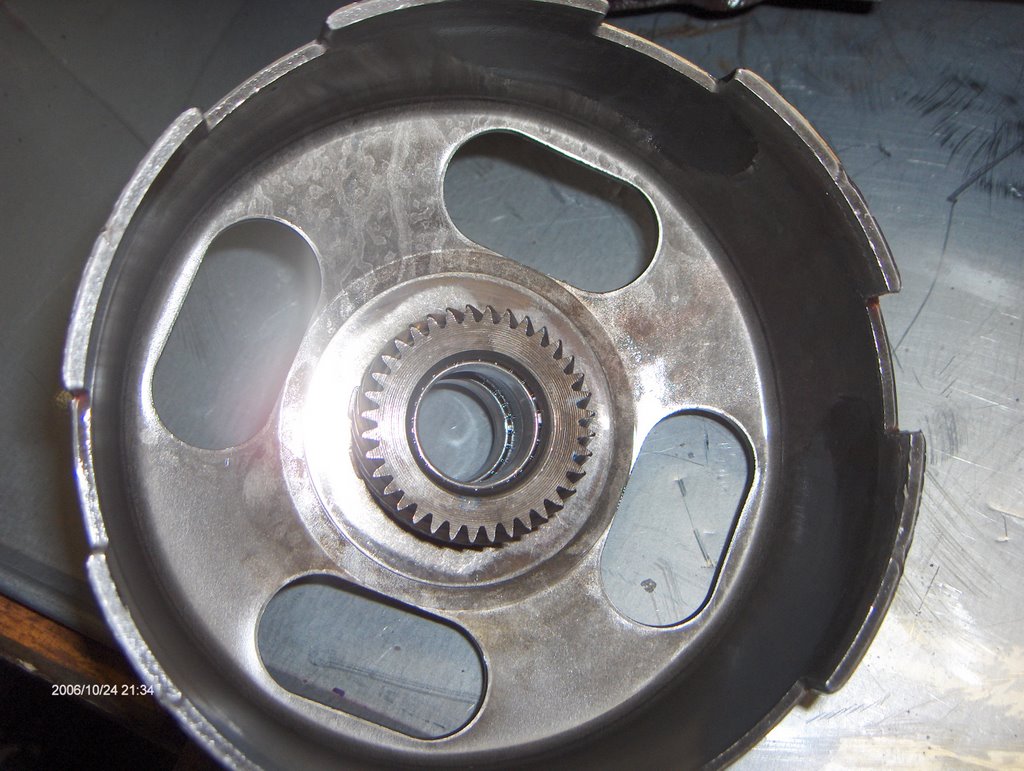 Facing upward as it does when removed through bellhousing
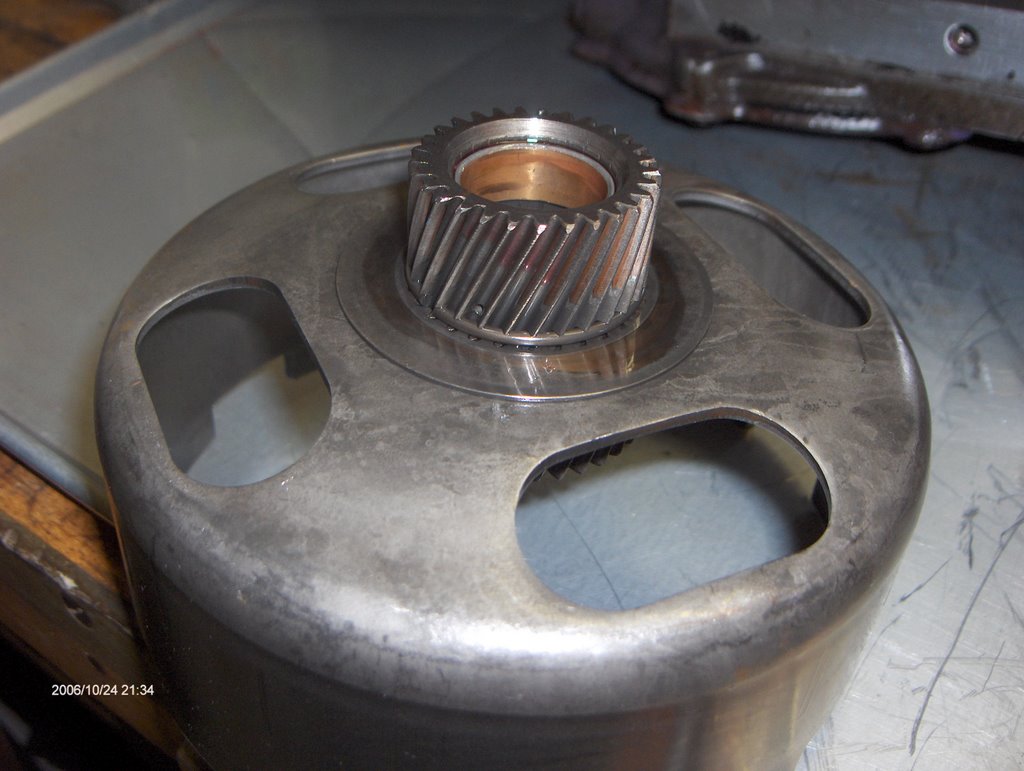 Face down showing sun gear
Thrust washers? Yep, I've got 'em....


I was considering just replacing the metal ones that have obvious signs of wear on them. Again, as I discussed this on the phone and in person with the trans parts guy, the condition of these does not necessarily indicate replacement is necessary. Regardless, I wanted to replace at least the metal ones....
...but they didn't have one of the washers individually without breaking into a set. They were absolutely willing to do that, but I took this as a sign and bought the whole set. For $17, it's hard to go too far wrong.
***
General notes:
I'm taking the MML's advice and bagging components both before and after I clean them.
 Front planetary carrier assembly before cleanup
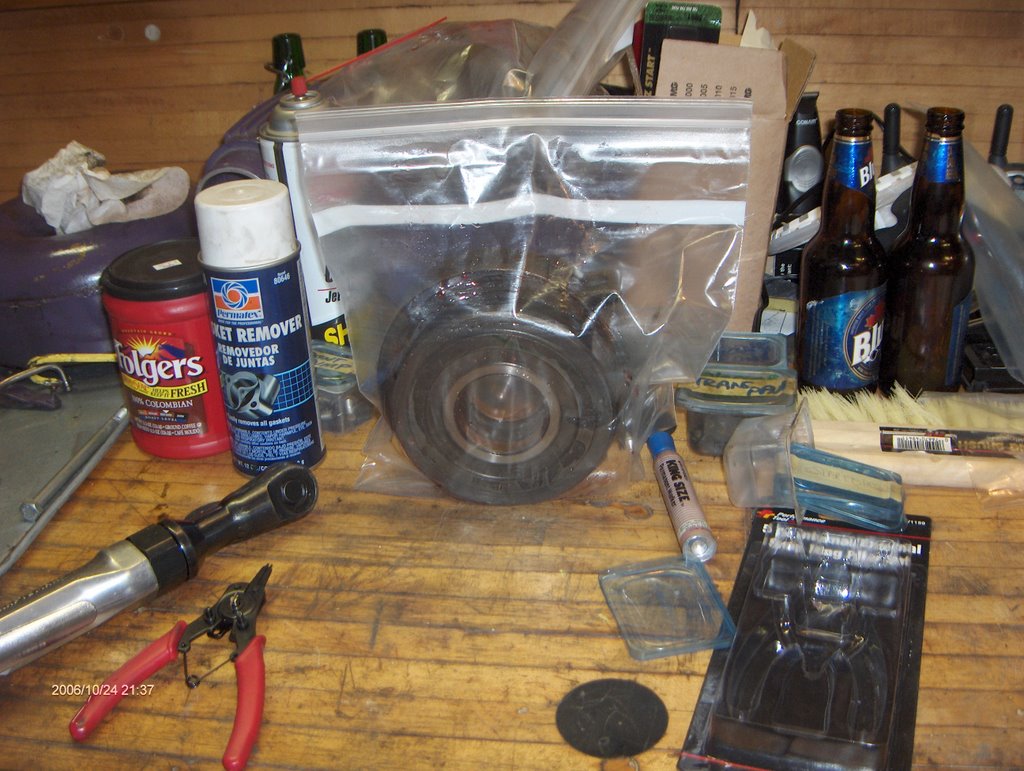 Forward clutch and band awaiting cleanup.
****
Next up is more cleanup of the assemblies shown so far. Once I've gotten that done, then it's on to the differential section of the trans. I bought the "bat wings" -- the differential pin retainer kit that Chrysler came up with to prevent the pin from walking out and destroying the transmission case. It may be a few days before I get working on this again...Halloween's coming, and the kids need a pumpkin!
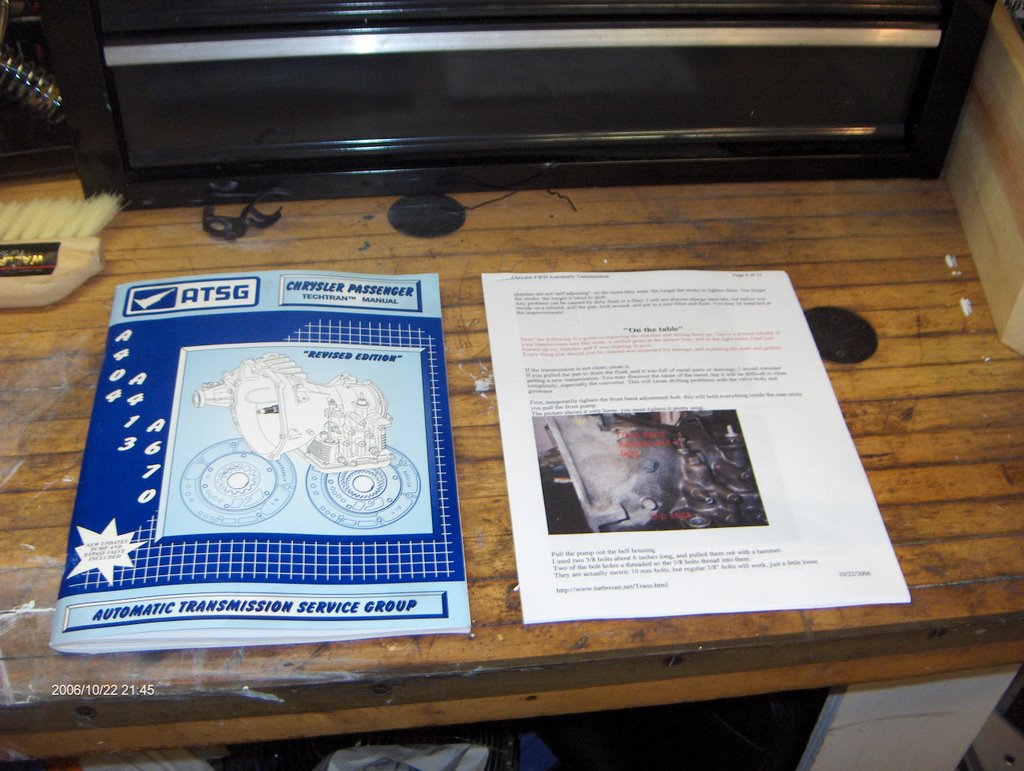
The ATSG manual is a big help; I also am indebted to Paul E. Smith, who has posted some rebuild information here, it isn't quite enough to go on by itself, but it does add some photos that the ATSG book doesn't have.
My goal here is to document this in pictures as much as I can...mostly so I can figure out how it all goes back together later! I also hope that maybe some of this stuff will be helpful to somebody else like me who's doing their first trans rebuild. So on to the pictures....
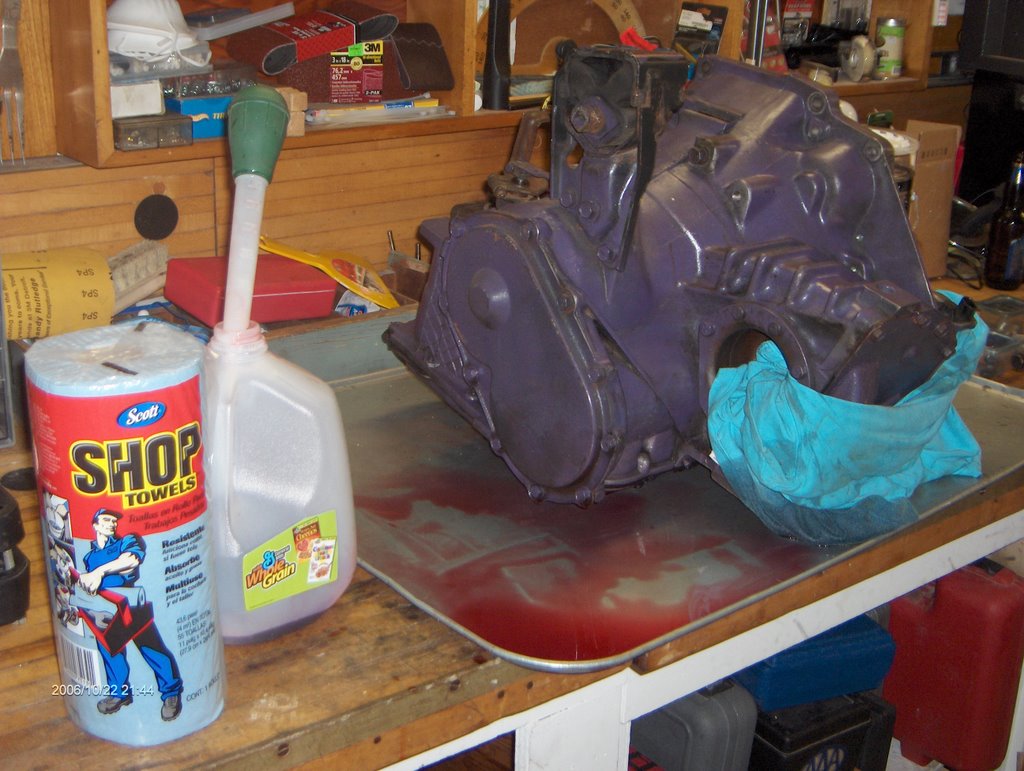 My little contribution to do-it-yourself home automatic transmission repair: notice the trans is sitting on top of one of those cheap oil drip pans you can get for under $10 at most any parts store. It's like a giant cookie sheet, and the raised lip around the edge will contain a LOT of liquid. It's impossible to completely drain the trans while it's on the car, so you need to be prepared to manage the mess ahead of time. Note the empty milk jug with the turkey baster sticking out of it -- I suctioned up the fluid from the pan and squirted it into the jug. I value my life highly, so I got my own turkey baster instead of using one from the kitchen. Finally, you'll see the roll of shop towels -- this is what has been recommended to me in using to clean the internal parts, as they're lint-free and disposable. Available at Autozone for $2 a roll.
 Organization: I know a few people who could take something as complicated as a transmission apart, throw all the pieces into a box, and then have no trouble figuring out where everything goes afterward. I am not that smart, and although I'm just as tempted as the next guy to take shortcuts, I figured out awhile back that such shortcuts usually end up taking me four times as long in the final consideration. So I label stuff, and try to keep my work area as neat as possible. I put each wrench back as soon as I'm done using it. I know, I know. I'm anal.
 These little containers are great for this kind of work. They started marketing baby fruit in them shortly after Joshua was born, and fortunately I hung onto a bunch of them. I used the same ones back when I tore the Intrepid's engine apart, and they're reusable over and over again. I'm not saying you should just go up to any woman with a baby and ask her if she has any of these...but you know, sometimes the oddest things have been known to work!
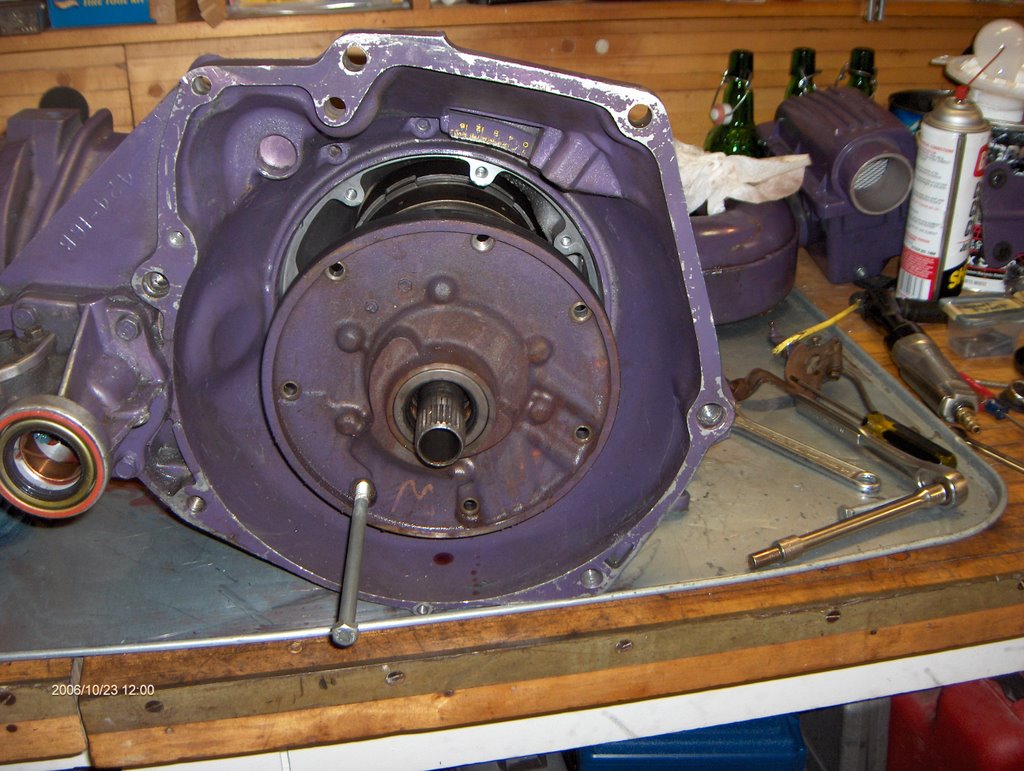 Pulling the front pump. I struggled with this for 45 minutes, even after reading that it should just pop right out, more or less, by using a couple of long bolts threaded into the bolt holes that secure the pump to the transmission body. Well, the ATSG manual isn't a lot of help on this -- they suggest you "attach slide hammers" -- and the other guy's website does mention that there are two threaded bolt holes in the pump, but I guess I'm dense or something. It turns out that two, and only two, of the pump bolt holes have threads that are in the pump body! All the bolt holes have threads, of course, but all except for two have them behind the pump body in the transmission case itself. I couldn't break that thing loose to save my life....duh! Now I'll be chasing the threads in the trans case a 'lil bit to undo some minor damage.
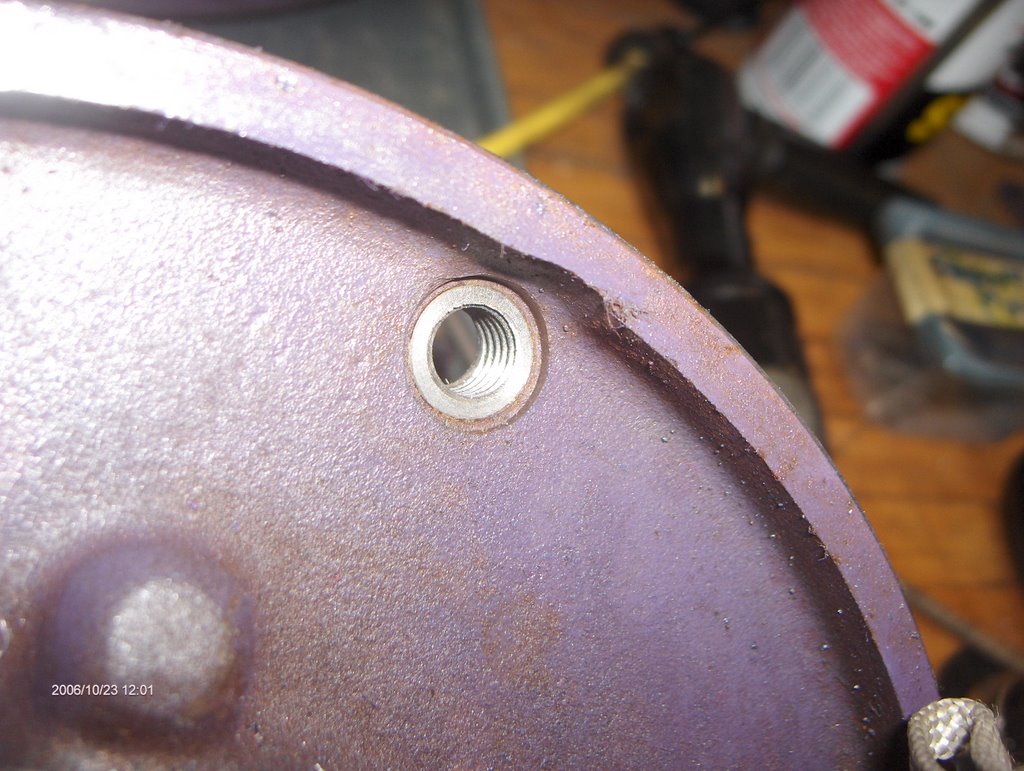 Here's a close shot of one of the front pump bolt holes that is threaded. You'll notice that only two of them are like this. A 3/8ths dia. bolt screws right in. Get one that's at least 6" long, and you can just pry the pump out of the case with a hammer like the other web site suggests. It really does come out easily when you're doing it right.
 Another image of the front pump -- this time out of the transmission -- with the bolt I used to extract it.
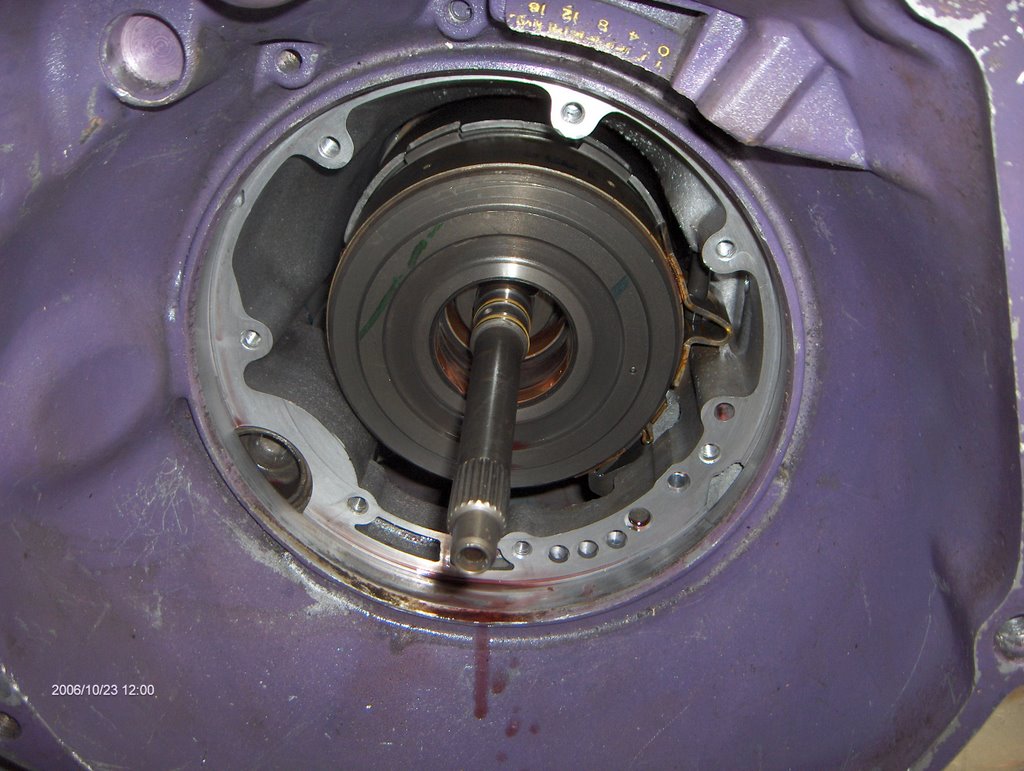 This is what lurks inside of the transmission behind the front pump -- the front (reverse) clutch assembly. You can't see it, but I've got the band adjustment cranked down as tight as it will go to keep everything together while I pulled the cover off, just as the ATSG book recommends.
 Here's a shot of the front pump, the front clutch assembly, the main shaft, and the rear clutch drum all lined up roughly the same way they are found inside the transmission.
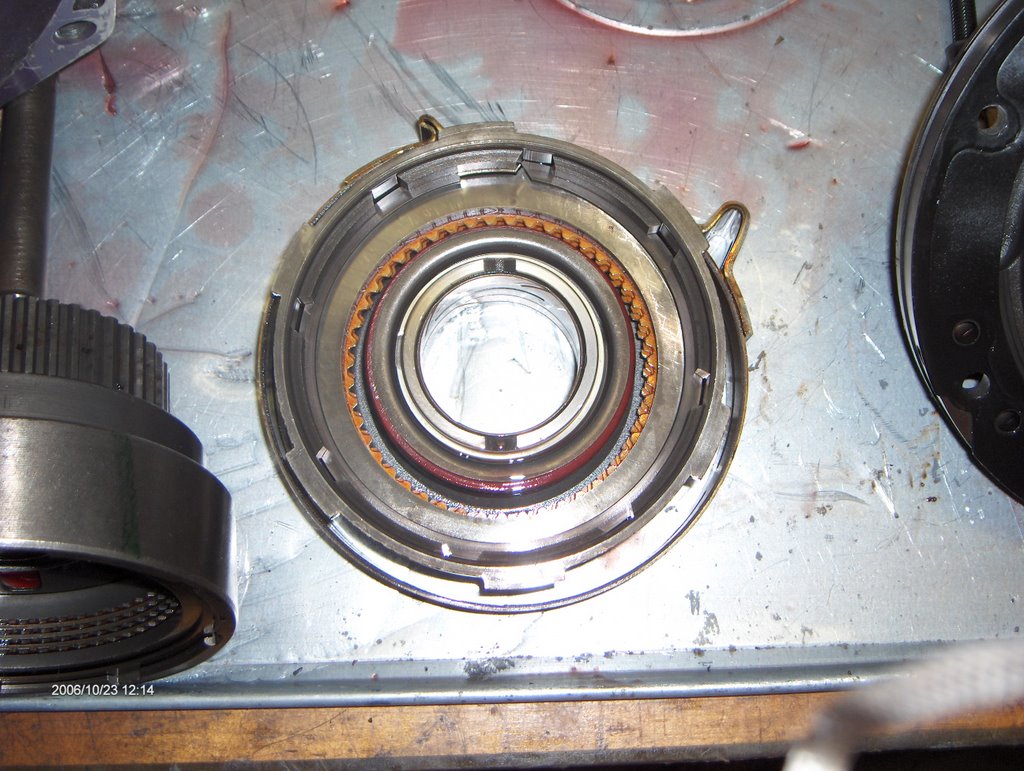
 This is a pair of detail shots of the front clutch drum assembly, again, remember I'm trying to document how things go together for myself.
 This is a pair of detail shots of the rear clutch drum assembly. Hopefully I'm catching everything in the pictures I might need when I go to reassemble.
 Finally, here's a picture of where I'll pick up next time -- this is a shot into the case of the transmission showing the #3 thrust washer. That comes out next.
¶ Monday, October 23, 2006 0 comments
Finally, here's a picture of where I'll pick up next time -- this is a shot into the case of the transmission showing the #3 thrust washer. That comes out next.
¶ Monday, October 23, 2006 0 comments
Finally I got things back underway, though and yanked it out on Saturday. Some thoughts on removing this trans:
- First and foremost, a lot of people mention what a bitch it is to get the 15mm bolt out that secures the starter through the engine block to the transmission. I literally spent a few minutes looking for "the difficult bolt" after I already had this one out. True, you cannot get a traditional socket and ratchet on it, however it's a piece of cake with a 15mm ratcheting box-end wrench. I already had pulled the axle shafts before I got around to loosening this one. This is one of those cases where having the right tool for the job pays off handsomely. I had the thing out in under a minute, and I understand some people have taken hours and hours to do this.
- Removing the flex-plate to torque-converter bolts: there are four of these, and first you have to remove the sheetmetal access cover, which involves backing out two 18mm bolts -- one through the front engine mount, the other just between the engine block and the transmission in the rear (firewall side) of the drivetrain. Then you have to remove the 10mm bolt that is in the center of the access plate. I then struggled for a bit trying to get the plate to come loose -- I hadn't loosened any of the other engine-to-trans bolts yet. I hammered it out using a long socket extension to catch the edge of the cover from above. You will also need some means of locking the crankshaft into place while you loosen the torque converter bolts themselves. I used my good old fashioned crowbar wedged between the flexplate and the bottom of the bellhousing. It doesn't take much pressure to hold things in place. Finally, you will need to rotate the engine 90 degrees at least three times to bring each bolt around to where you can reach it. I used a 13mm socket on a long extension to the center of the crank pulley and my 3/8ths ratchet. Works great when all of the sparkplugs are removed.
- I tossed 'round the idea of just pulling the entire engine/trans as an assembly. In the end, I think just dropping the trans out the bottom using an engine crane is less work. I have the car supported on jack stands with 20" of clearance between the floor and the bottom of the radiator support. This proved to be more than enough room to easily slide the trans out. I'm still a relative newbie, but working with air tools by myself I had the trans drained and sitting on my workbench 3 hours after I started raising the car. Not bad...
- An engine crane or cherry picker. I got mine used for $60 -- I think they're around $140 new at places like Harbor Freight. If the roof in your garage has exposed rafters, you might get by with a come-along, although I'm sure glad I don't have to do it that way. For one thing, you'd probably have to remove the hood to use a come-along, while the engine crane will just sneak right in under the hood. After I got the transmission out, I backed up the crane a few inches and attached the chain to the main ground point on the driver's side of the cylinder head to support the engine--which hung in there just fine on the two remaining engine mounts while I removed the trans. I don't think you need to have any special support for the engine while removing the trans-- for a short term, it apparently is well enough supported on the front and passenger side mounts that it isn't going anywhere.
- I think the transmission jacks that support the trans from underneath would be a lot more difficult to use. I attached the crane's chain using the bolt-hole on the top of the bellhousing, just to the right and slightly below the timing window. It isn't the largest bolt on the transmission, but it supported it with no sign of strain.
- Get yourself a 15mm ratcheting box-end wrench for that starte bolt!! Check out Sears item #00942596000 Mfr. model #42596, or #00947819000 Mfr. model #9115 -- either one of these will do the job.
- Jack stands. Must have. No excuses.
- I am fortunate enough to have air tools to use, including a pneumatic ratchet and an impact gun. It makes the business of removing some of those big 18mm engine-trans bolts or the 15mm sway-bar bolts a piece of cake. If you don't have this luxury, invest in a good quality 1/2" breaker bar.
- A 'rough service' bulb for my trouble light. I drop my trouble light. A lot. I would've replaced at least three standard lightbulbs after that thing hit the floor just while pulling the trans alone. Worth the $1.99 at Autozone. If buying online, consider http://www.sjdiscounttools.com/slp60016.html
- Have lots of oil dry handy, in case you do what I did, which was not moving the drain pan far enough away from underneath the trans when I actually dropped it down. Yep...most of the fluid I had so carefully drained ended up on the floor anyway. Yuck.
 The patient sits on my bench awaiting surgery.
 Yes, it's purple, that's the color my kids picked when I cleaned it up to install it...
I spent the afternoon at Parts Galore, my favorite junkyard, finally yanking the axle shafts out of a forlorn '86 Daytona Turbo Z that I had earlier rejected because I thought the boots didn't look perfect. As it turned out, the axle shafts are in good shape, and even though that Daytona was a 5-speed car, they bolted right up (including the intermediate shaft) with nary a problem. I bolted the front suspension all back together, fired up the engine, and took it for a ride!
Of course, there are issues.
- Haven't experienced an upshift from the trans, and somehow the gear selector has gone out of whack again. Looks like I've got more fiddling to do, and possibly some valve body issues. Wonder what it could be.
- I'm not getting a lot of power from the motor. Well, not as much as I would expect, anyway. I've brake torqued the hell out of it with my vacuum/fuel pump pressure gauge attached and it seems to be stopping around 4psi of boost. There's a lot of knocking and pinging going on, too, which I am currently attributing to crappy gasoline, but I'm going to have to look carefully to be sure. There's certainly enough knocking going on to explain the poor power output, though, so I might try a can of that 104 octane boost and see if that doesn't help the horsepower cause.
- Evidently there's a minor transmission fluid leak; probably at one of the radiator hoses.
- I'm seeing a LOT of water vapor out of the exhaust, but oddly, it doesn't smell like antifreeze. During tonight's brake torque run, I drove a LOT of water out of the exhaust system. I wonder if, again, this is a fuel issue, or something more problematic.
- There's significant noise around the upper timing belt pulley. Not sure what is going on exactly, though.
Slowly, this thing's turning into a real car, and I can see where things are becoming very, very positive. Yes, there are some technical issues, and some of them might involve some work to fix, but for the sort of transplant I've done here, I expected some issues. Remember, "they" said a newbie shouldn't attempt to put a turbo into a non-turbo car, it was too difficult, and I've done it.
I've verified that the turbo wastegate moves freely, and the canister solenoid actuates when pressure is applied (not vacuum!) I've got the ignition timing set as best I can figure without a timing light; I've tuned it so I get maximum vacuum at idle; around 15-16PSI.
So, I'm on my way. I'm not done by a long shot, but it was very gratifying to drive the car. Now to make it run well and reliably...
¶ Thursday, May 11, 2006 0 comments
Jim is a retired tool and die man who says he has had a passion for Ford Model As since he was a kid. He quit working about 4 years ago and looks to be somewhere in his late 60s or early 70s.
He already has a restored example in his attached garage; that one is a sedan, while the one he's currently working on is a coupe with a rumble seat.
The car was purchased a few years ago in a state of partial restoration. All of the filling in the body had been done with lead, and the coachwork is phenomenal. There's not a ripple to be seen anywhere in the body at all, which has a beautiful coat of dark maroon paint.
Jim is currently rebuilding the engine and considering altering the transmission with a syncromech, although he says the cost is probably going to be prohibitive. The interior is bare metal right now, and the dashboard is missing; you can see into the engine compartment from inside the body shell. It's obvious the car will be a museum piece when he's finished; the attention to detail is striking. He has a new reproduction rear bumper on the car now, which he says appears to be a couple of inches short. The cylinder head was resting on the frame at the front of the car today; it's been machined and appears to be ready to bolt up.
There are enough car enthusiasts (or the evidence of them, judging by all the covered vehicles I see in garages while out on walks) in the neighborhood to start a car club - maybe 'Hatherly Area Auto Enthusiasts' or something like that. Maybe someday that idea will take root. ¶ Friday, April 28, 2006 0 comments
I've struck out in the junkyard axles department. The Daytona axle
boots were dry-rotted and in tough shape. The LeBaron axles were the
larger diameter.
I've gotten REALLY good at removing axles. I did all the work to drop
the swaybar, free the balljoint on the passenger side and remove the
axle on the LeBaron in under 40 minutes using just hand tools. Bet
with air tools I could do it in 15 minutes.
So I'm gonna punt. I've ordered up OEM-style replacement boots and
I'm going to disassemble the joints I have, inspect them, and
hopefully just replace the boots and call it good. If one of the CVs
is bad, I'll end up popping for a rebuilt replacement axle, but
hopefully luck is with me (hasn't been so far, of course, but you
never know.) Then we'll get this thing put together and at least
fully know the condition of the CV joints. At less than $10 more than
the cost of a pair junkyard axles (and not knowing their true
condition before installing them) replacing the boots on the ones I
have seems like money well spent.
I've been reading about water/alcohol injection this week and it looks
like guys are saying they can safely dispense with the intercooler!
One guy said he had FROST forming on one of his intercooler pipes and
the intake was cool to the touch after a hard run. I wonder if this
is an easier and perhaps more effective solution to cooling the air
charge on this suck-through T1 I've got?
I had changed over the bracket that the shifter cable attaches to from the TBI trans to the turbo trans so it matched the cable connected to the column. In the process, I mistakenly pulled up too hard on the manual valve shaft, disengaging the detent spring and making it impossible to shift anything.
Well this afternoon I finally directed my attention toward this and took the pan off the trans again. (This is the third time. First time was to try to repair the original mistake and also change the trans filter, second time was when I realized I hadn't put the fibre gasket in place between the filter and the valve body. I'm getting good at R&Ring that pan.)
I dismantled the valve body from the transmission again to try to determine the problem. Trouble was, I could hit the Park detent no trouble at all with the valve body out. I played around with the manual valve itself, poring through the FSM, and from what I could tell I didn't have it installed backward or anything.
I did a test reassembly, and discovered that the manual valve stem was protruding too far on the engine side of the case and limiting the movement of the selector through the detents.
Obviously, I was assembling something incorrectly, but without the benefit of a complete set of assembly diagrams (the FSM is a little weak on that, IMO), and never having seen it put together correctly, I was just guessing.
Well, I took the manual valve shaft off of the throttle valve shaft again at this point, trying to see if it had somehow gotten twisted or something. I concluded it hadn't. Then I accidently put the thing back together CORRECTLY!
There is a tang on the stamping that engages the detent spring which actuates the manual valve stem. I had been placing it against the end of that valve stem, thinking that hydraulic pressure must keep it forced against the tang. In retrospect, that doesn't make a lot of sense, but it's how I had formed my mental image of how it must work.

Screwdriver points at correct location of tang in between "rings". I had been placing
it "outside" the rings (would be to the left of the valve stem in this picture).
All of a sudden, the range of movement of the valve stem was now almost completely inside the valve body at the other side, and even better, the stem moved with each corresponding movement of the selector lever through the detents! Yep, once I saw it that way, it made perfect sense!
Now that I've reassembled the trans, I've got the gear selector moving through all of the detents it should, and the cable is magically in the correct adjustment. Amazing the difference once things are put together properly.. :-
Oh, well, one more little problem solved! ¶ Sunday, April 02, 2006 0 comments
So tonight I got my vacuum pump out and put some vacuum on that line manually. At first, it looked like it wasn't holding vacuum, and I thought I was in for some leak detection. But fortunately, I pumped some more before giving up, and whaddya know, it started holding vacuum quite well! I went inside the car, and was able to operate the blend doors using the dashboard control just fine, as long as I kept the vacuum pumped up.
So I teed into the vacuum line from the brake booster and started the engine up. No vacuum whatsoever coming from that line. Hmm. Pulled the hose off the booster and heard a sucking sound. Then I removed the check valve and tried to suck on it with my mouth in the direction it was hooked up.
It was installed backward, of course.
That wasn't my doing. The previous owner had done a lot of work to the car according to what he told me in an email, and obviously he had tinkered with this check valve and reinstalled it incorrectly.
So, yet another little item fixed!
I also connected the vacuum gauge to the manifold and noted that it was a little bit low. Since my timing light is on the fritz, I haven't been able to set the timing properly. Tonight I loosened the distributor and futzed with it until the vacuum was at about 17" and holding fairly steady. I think it's probably timed pretty close to spec now. ¶ Sunday, April 02, 2006 0 comments
I still have lots of work to do, as I mentioned, but a little bit here...a little bit there.... ¶ Wednesday, March 29, 2006 0 comments
